After reading about people's boondocking adventures, Bach and I decided that we would also try to boondock as much as possible while on the road. Free camping! Saving money! Open spaces! These are all very appealing reasons to boondock, but in order to do so, we took the advice of veteran RVers and prepared our rig fully before hitting the road.
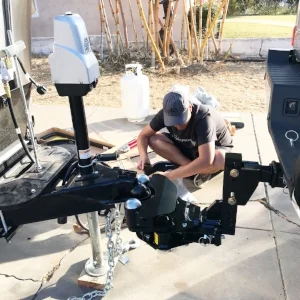
Bach being the nerd 🤓 that he is, wanted to install the solar system himself. Thankfully he's pretty handy!
Here's his guide for the solar system install he did himself (I helped... with handing him tools):
Research
I’ll preface this by saying that I write software for a living and have a passing familiarity to electrical concepts but I am by no means an expert. I’ll also mention that what we’ve written below and the parts we have chosen are our own choice. We are NOT sponsored by any of these companies so our opinions are our own without outside influence.
Working with electricity is dangerous so if you’re at all uncomfortable doing things yourself, please ask for help from a professional.
Before embarking on this project, I did a lot of research to figure out:
How much solar I would need in order to work full time in the Airstream.
Which products I would use in our setup.
Where I would install those parts in the Airstream.
The resources I found most helpful in determining how to even go about getting a solar system were:
The More We Explore’s videos on their solar installation.
The parts
We are in our mid-thirties and as we’ve gotten older, we’ve tried to buy what we’ve considered to be the best products we could buy. The reasoning is that if we buy products that last, we usually don’t have to buy replacements. Buy it once for life rather than buy something that we’d likely have to replace down the line. This minimizes material waste as well as a waste of our time re-doing things.
Our research on RV solar frequently led us to a handful of brands that stood out from the rest in quality and simplicity. Those brands are AM Solar, Victron Energy, and Battleborn batteries.
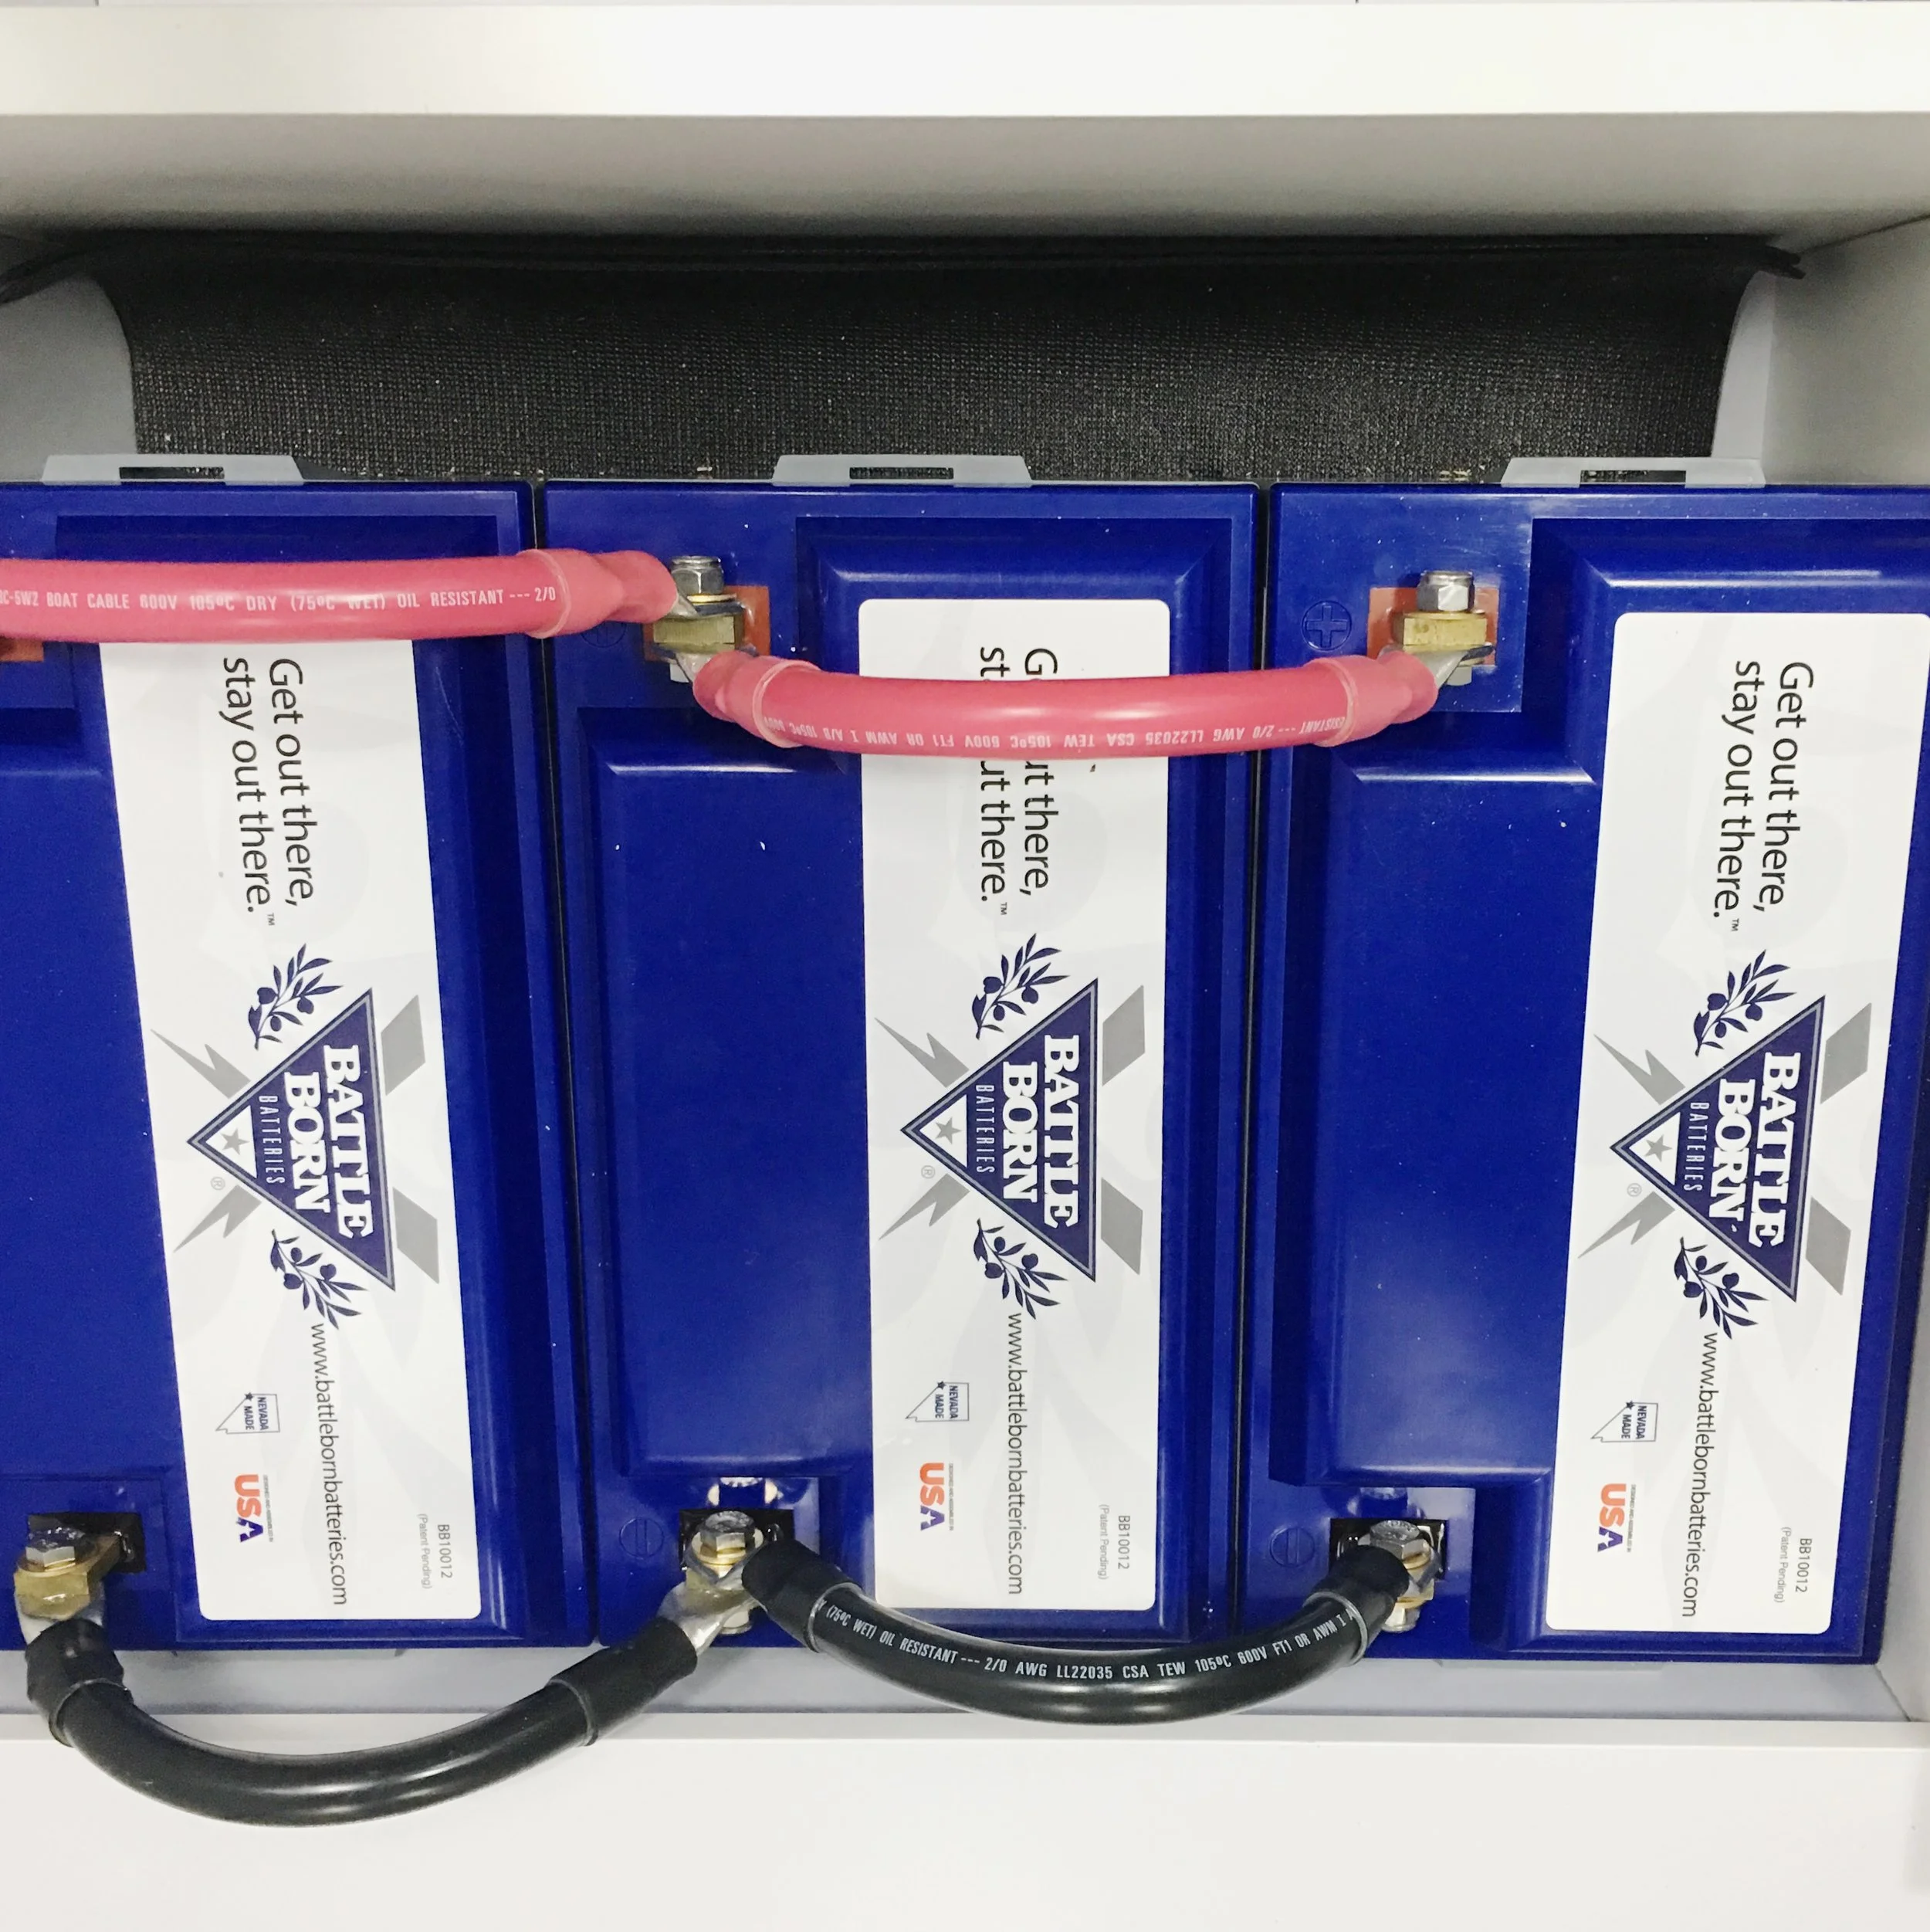
Batteries - 3 x 100Ah Battleborn Lithium Batteries
I looked into a TON of battery solutions. There are many brands of lithium batteries out there at various levels of complexity. At one end, you can go VERY DIY and buy cells directly from a manufacturer in China . The downside to this approach is that the cells also need a battery monitoring system to make sure the cells are not overcharged or over-depleted as both of these actions can damage a battery and you lose capacity over time. With my cursory understanding of battery tech, I wasn’t keen to go down this path.
Others, like Troutboy from Air Forums, used Victron’s lithium batteries while The More We Explore used batteries from Elite Power Solutions.
We decided to use Battleborn batteries because they are made in the United States and we want to support American businesses whenever we can, but they also had the most complete lithium solution without requiring extra parts. This sets it apart from Victron in my opinion and simplified my install a bit.
Inverter: Victron MultiPlus 3000VA
When it came to inverters, the choice was simpler. I knew I wanted to have one that would provide enough power for our computer equipment and entertainment devices but also be powerful enough to run one of our rooftop AC units on the lithium batteries when we needed temporary relief from the heat.
The choice was always between the Magnum MSH-3012 and the Victron Multiplus 3000VA. These two satisfy my requirements. Between these 2, the Victron had the edge with a more cohesive eco-system and it plays well with the other parts that also happen to be Victron in our setup.
Solar MPPT Controller: Victron SmartSolar 100/50
This part is the required middle man between the lithium batteries and the solar panels. There are 2 types of solar controllers you can buy. One type is PWM (pulse width modulation) and the other type is MPPT (Maximum Power Point Tracking). These controllers at a very basic level connects your solar panels to your batteries in order to charge them. To get the most out of your panels, many people suggest using MPPT controllers.
We chose the Victron SmartSolar 100/50 because it has bluetooth built in which allows us to monitor our solar output from our smartphones without having to check a fixed screen all the time.
Solar panels: 5 x AMSolar SP100 Solar panels
If you read what the professional installers of RV solar say on Air Forums about flexible solar panels, you’ll see that no one recommends flexible panels and they almost all solely use AM Solar panels because AM Solar has a reputation for making products specifically for RV applications but they are also the highest quality solar panels you can buy for RV applications. The choice on this one was pretty simple. These are the smallest panels you can buy from AMSolar that produce 100W and given the limited roof space, this one is a no-brainer.
Battery monitor: Victron BMV-712
To go along with our new fancy system we also needed a way to see how much power we’re consuming and how much power we have in our batteries. Since our other products were Victron and this particular model has bluetooth built in with an app for our smart phone, this choice was easy.
The plan
My plan on where the components would go changed over time. The main challenge with an Airstream is that running wires in the walls is practically impossible so our options were pretty limited. There are many creative solutions out there like Lewster’s custom made aluminum channels to hide your wiring.

While the fit and finish of this is top-notch, this would’ve taken too much time for me to figure out, like where to source it as well as how to attach it to the Airstream. I really didn’t want to drill any holes into the aluminum for rivets so this solution was out.
If you watch AM solar’s install videos or even look at Troutboy’s installation, the batteries are usually installed under the bed or under the lounge. LeTwinkie is a 2018 30ft International Signature and in this particular model, there is a channel that goes from the driver to passenger side, right where the fridge and closet are which makes the closet the ideal location for our batteries. Not only is there a lot of room for our batteries, but this also places the additional weight directly over the axles which is the most ideal location.
Once I knew that I wanted to place the batteries in the closet, solar panels on the roof (of course), the inverter only had a couple places it would possibly fit.
In the closet.
Behind the electrical panel in the space beneath the fridge.
After measuring the opening for the electrical panel and measuring our inverter, I was sure it would fit in that space so now that I knew where all the parts would go, we can begin installation.
The installation
Installing the solar panels
I started with installing the solar panels first. The panels came from AMSolar and came with everything necessary to do the installation. Unfortunately, when they shipped the order, they made a mistake and shipped the wrong panels so I had to wait for them to send replacement panels before installing. The good news is their customer support is stellar and they fixed the issue as soon as I notified them.
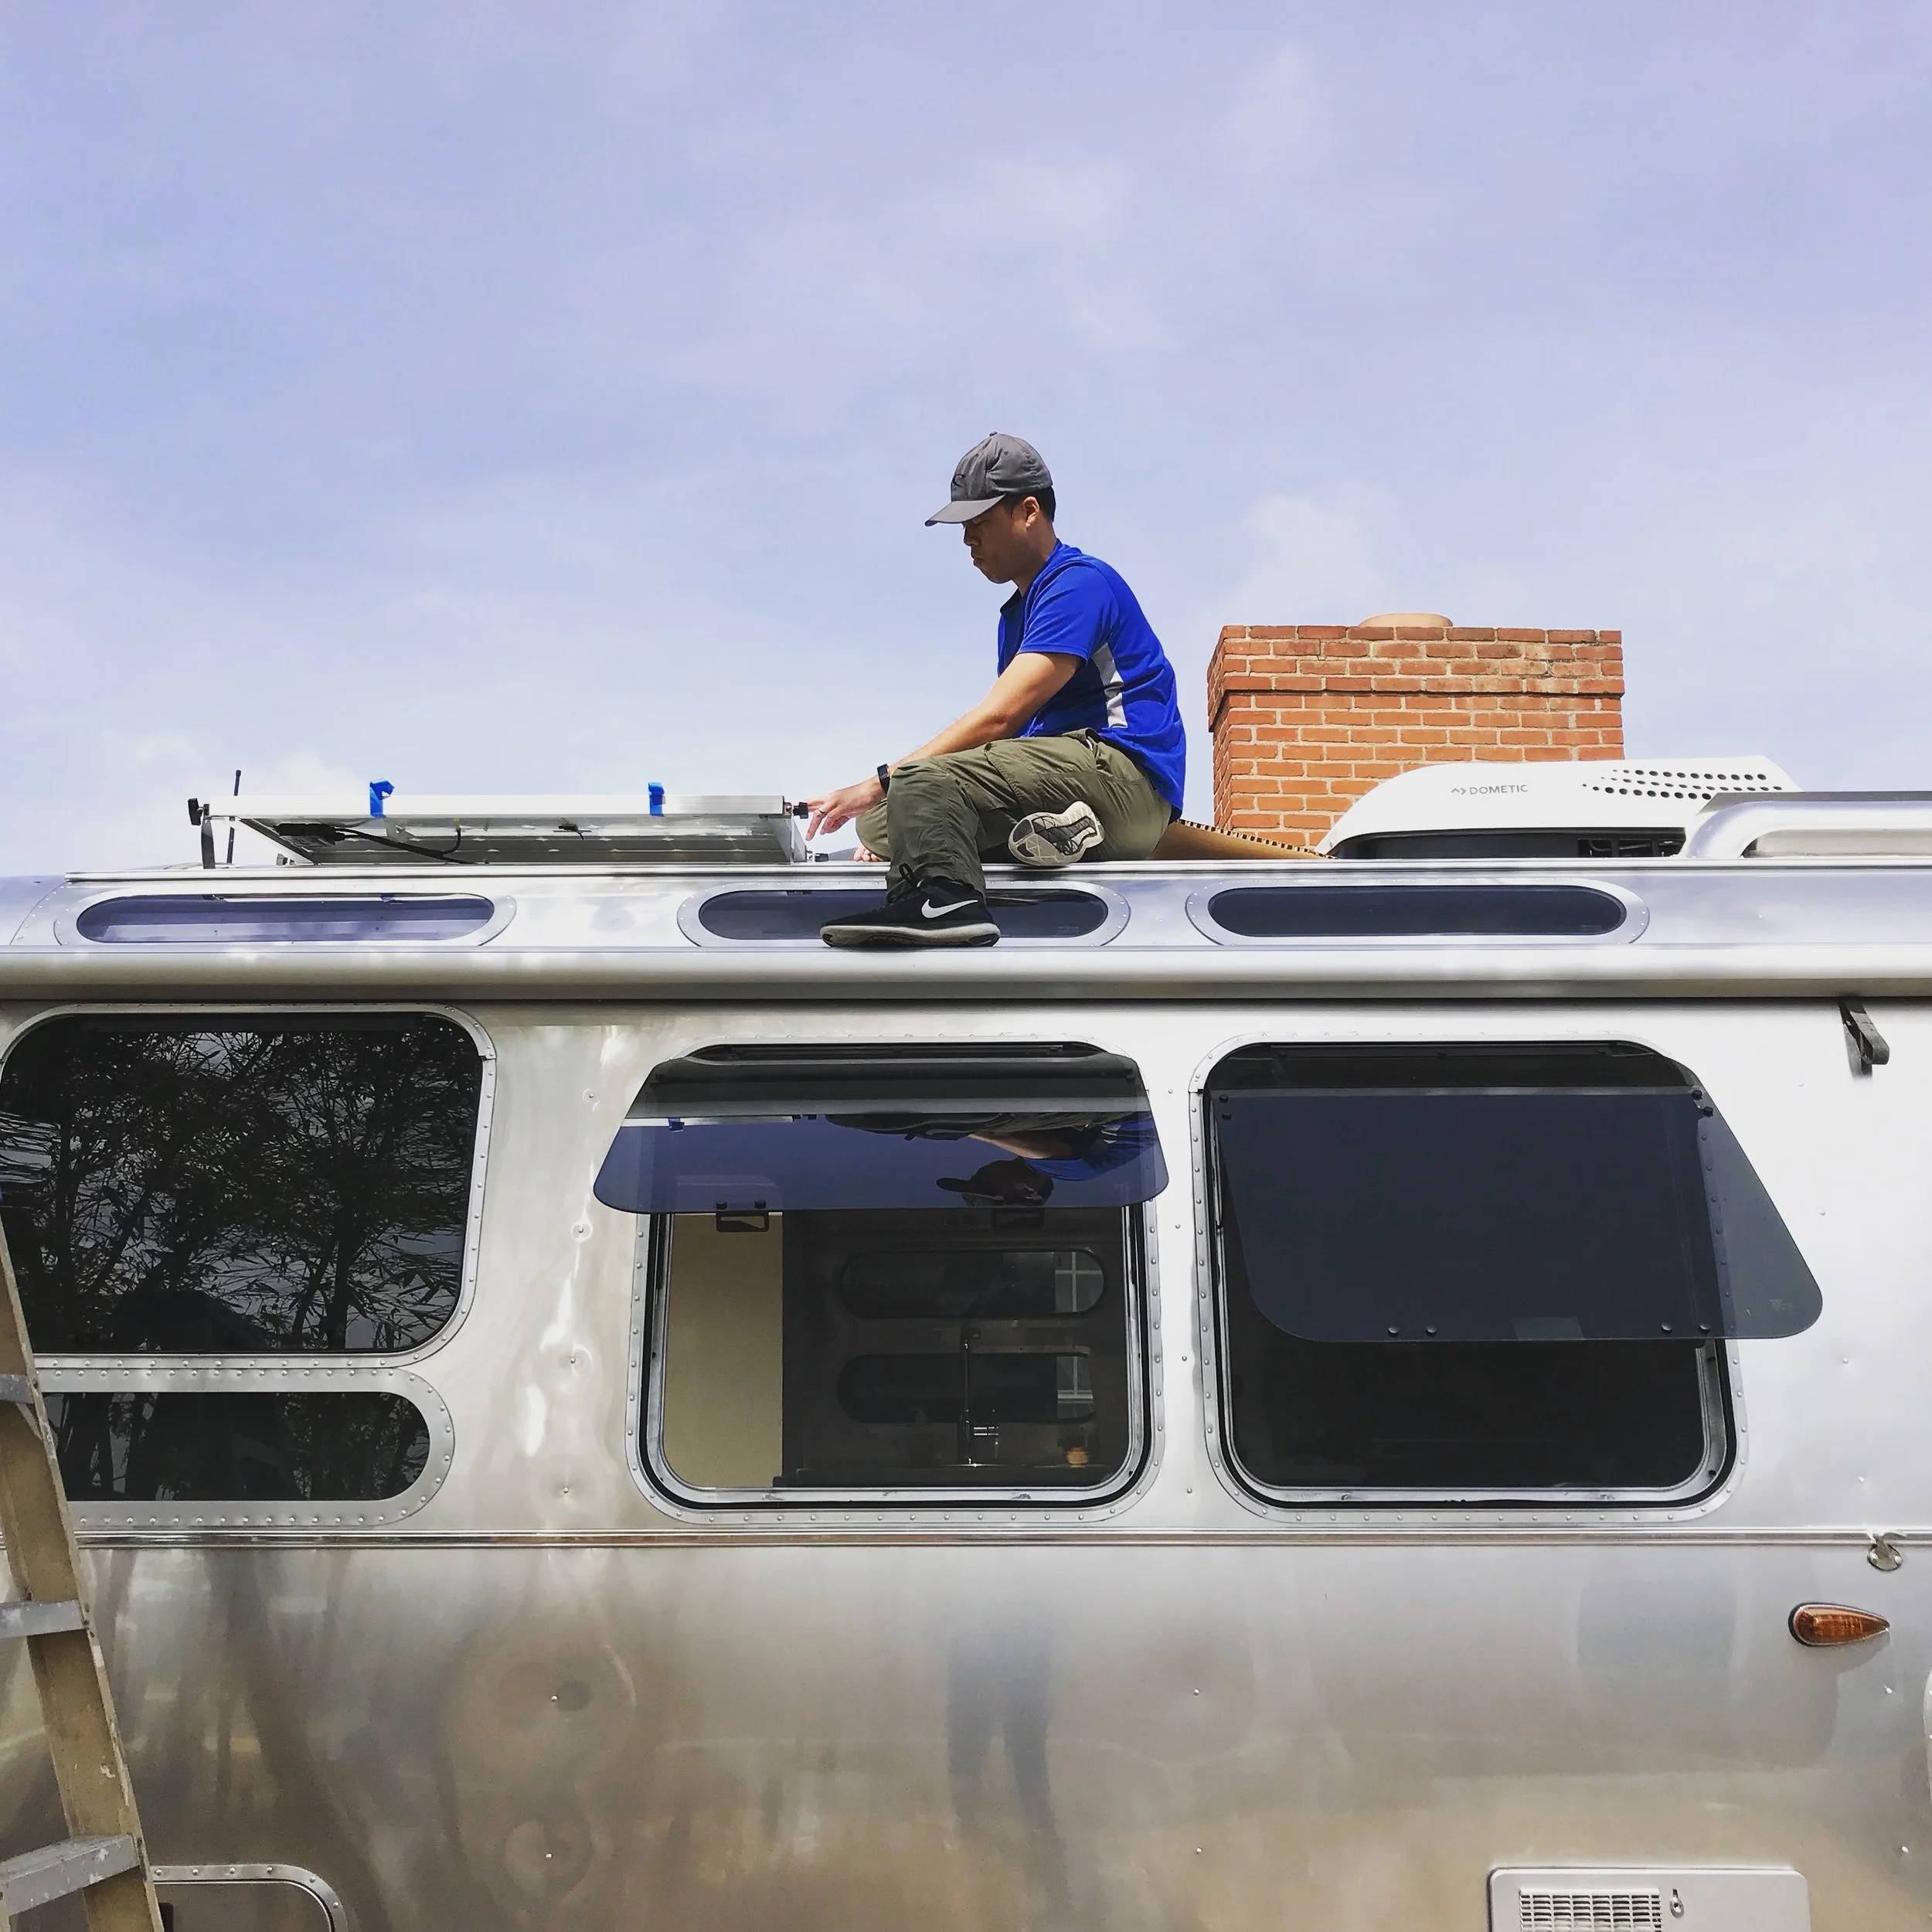
AMSolar makes mounting feet for the panels that work VERY well on the Airstream roof. Those feet combined with VHB tape and Sikaflex allowed me to attach the panels WITHOUT using screws or rivets. At first, I was skeptical but after almost 15,000 miles on the road with these panels, I can confidently say that this WORKS.
The plan was to mount the panels on the roof and terminate all of the wires in the combiner box from AM Solar, so I started putting them down one by one and those were installed without much trouble. The only major trouble I had was being careful moving around on the roof of the Airstream.
Installing the combiner box
The combiner box is where all of the solar panels terminate and from there 2 wires of adequate gauge will run down into the trailer to the MPPT controller.
Many folks installing solar on an Airstream with a fridge vent use it to run wires into the trailer. This is the path we chose. The first step was to remove the aluminum fin attached right next to the vent and drill 2 holes to pass through the wires.
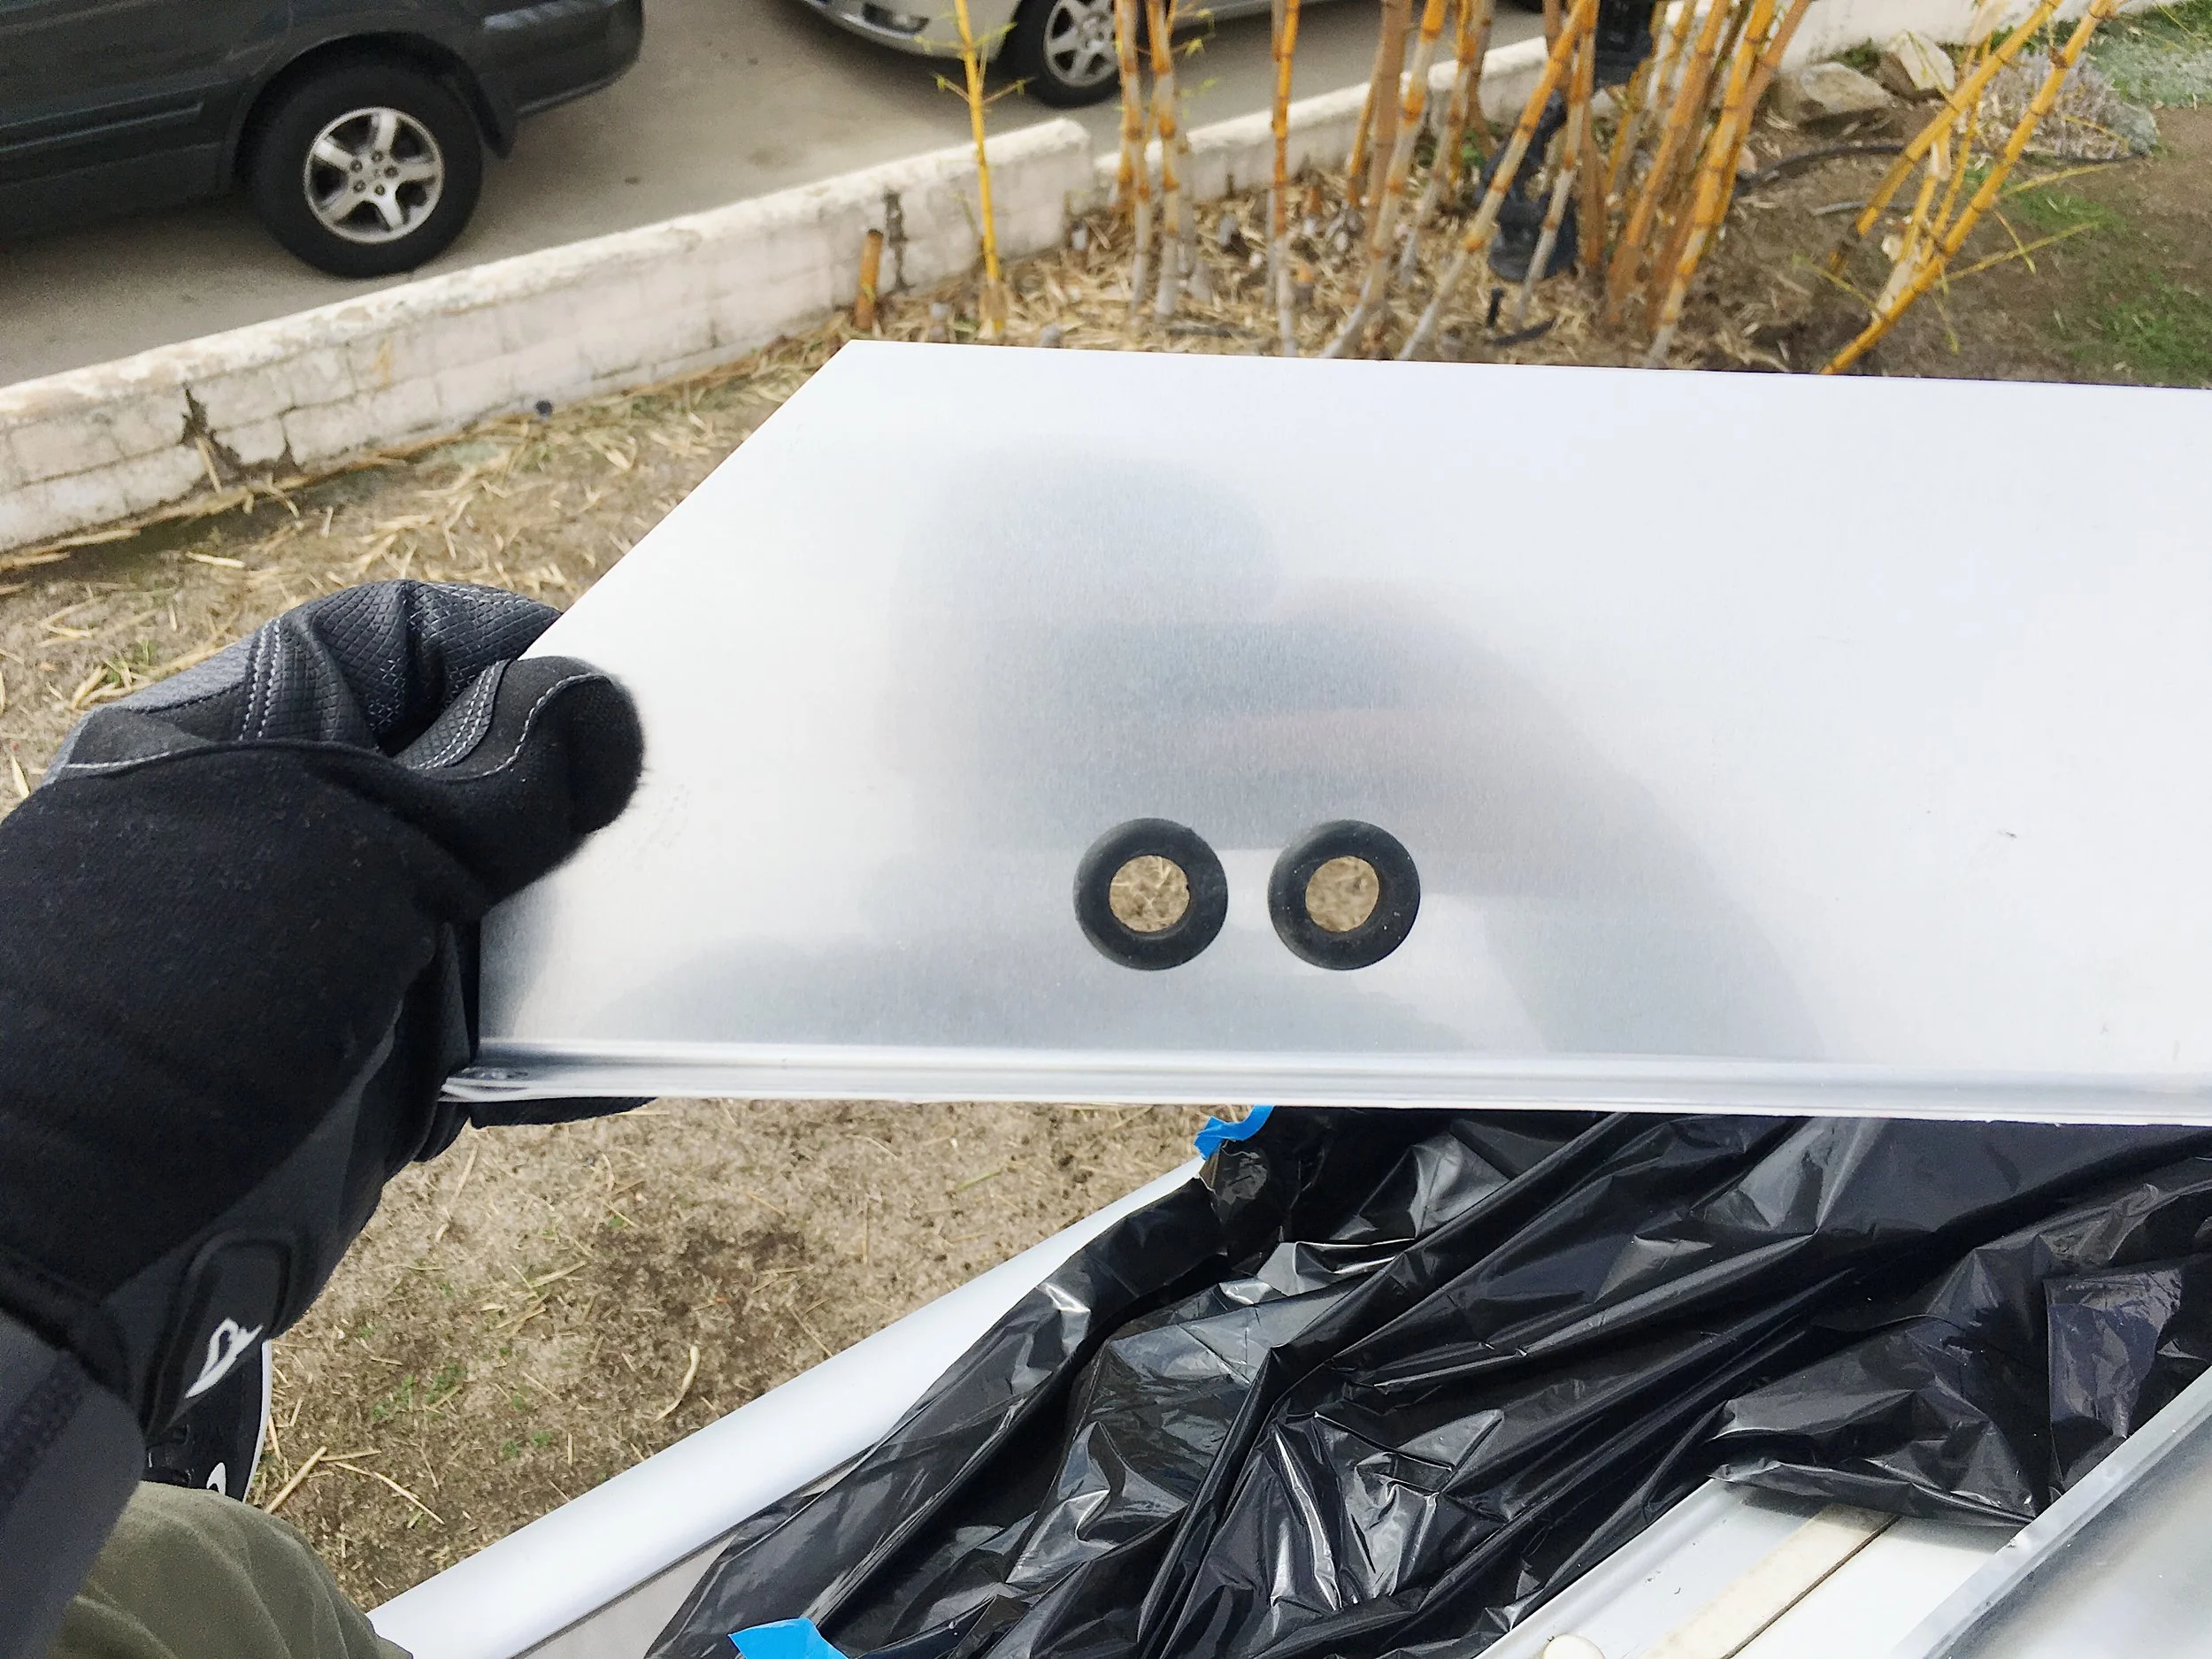
Drilled 2 holes and added grommets to prevent the wire from rubbing against the metal.
The next step was to drill 2 holes into the refrigerator vents and install the cable glands. The cable glands ensure a water tight conduit and also provides strain relief to the wire. As you twist the adjustable end of the cable gland, there is a rubberized lining that gets compressed around the wire to prevent water from entering.
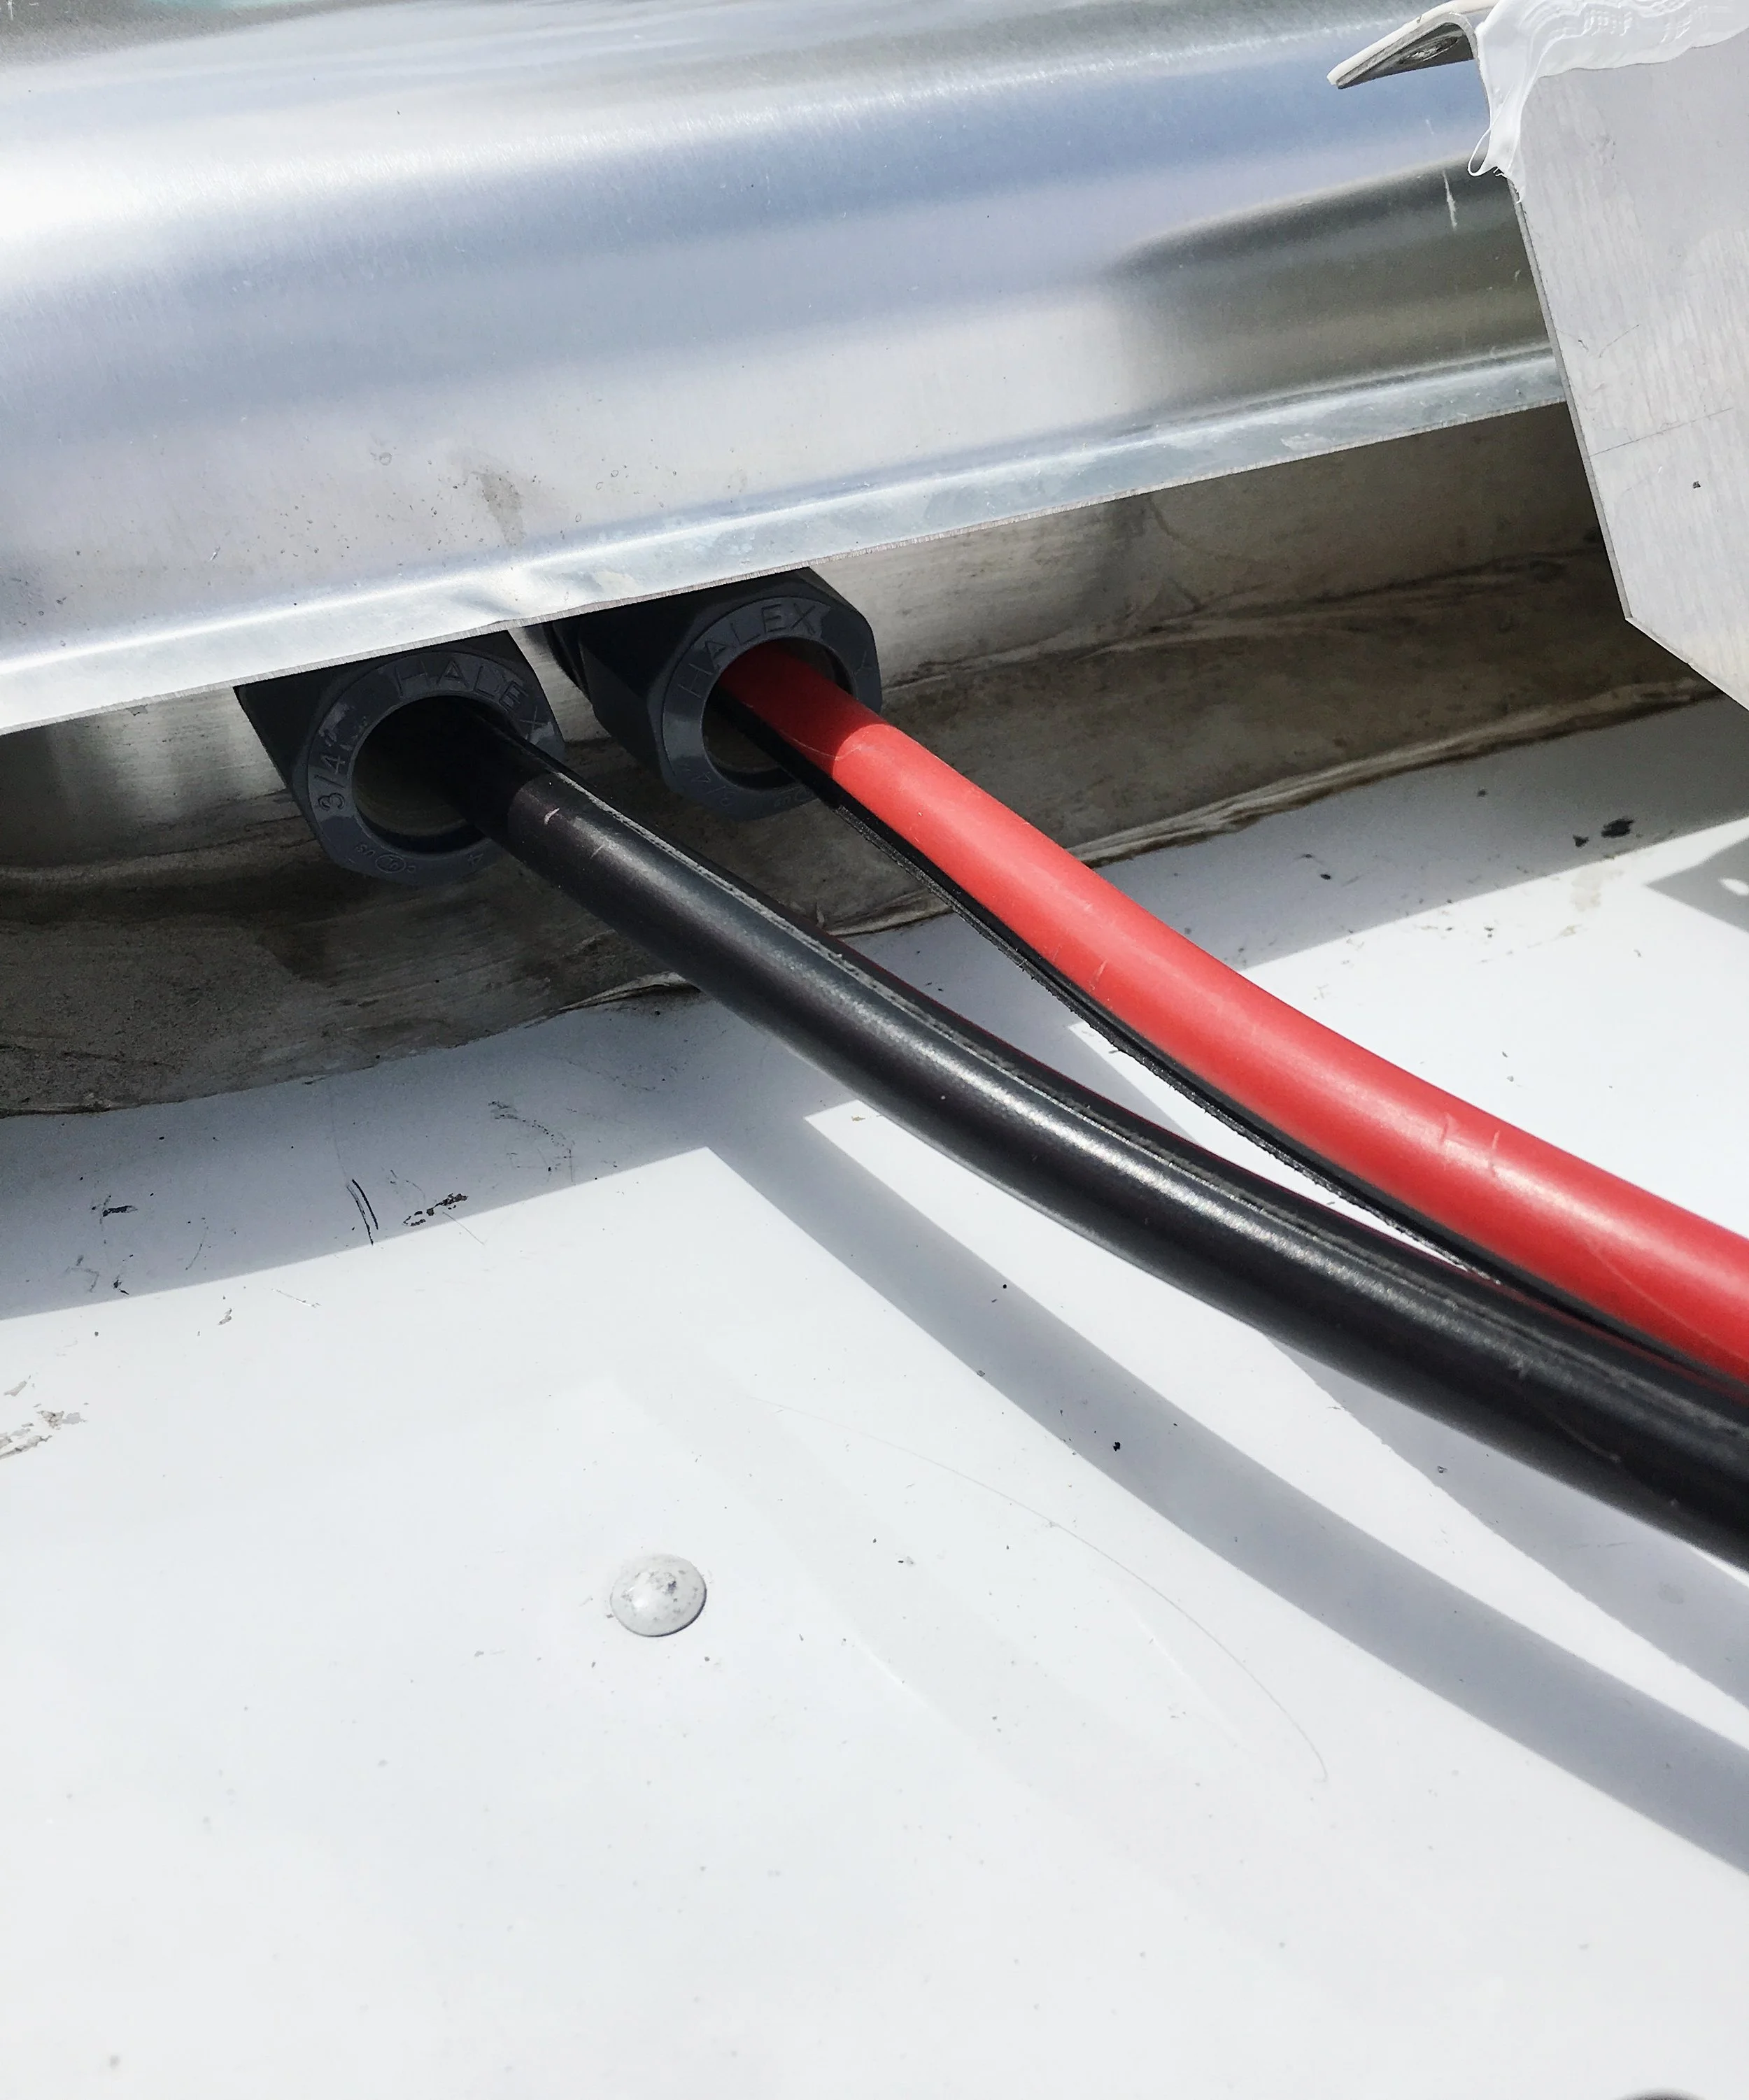
Cable glands attached to the vent. Wires passed through gland from inside the trailer.
Once the wires were through, I need to also pass it through the fin covering the fridge vent and re-attach that fin to the roof of the trailer and reseal it with Sikaflex.
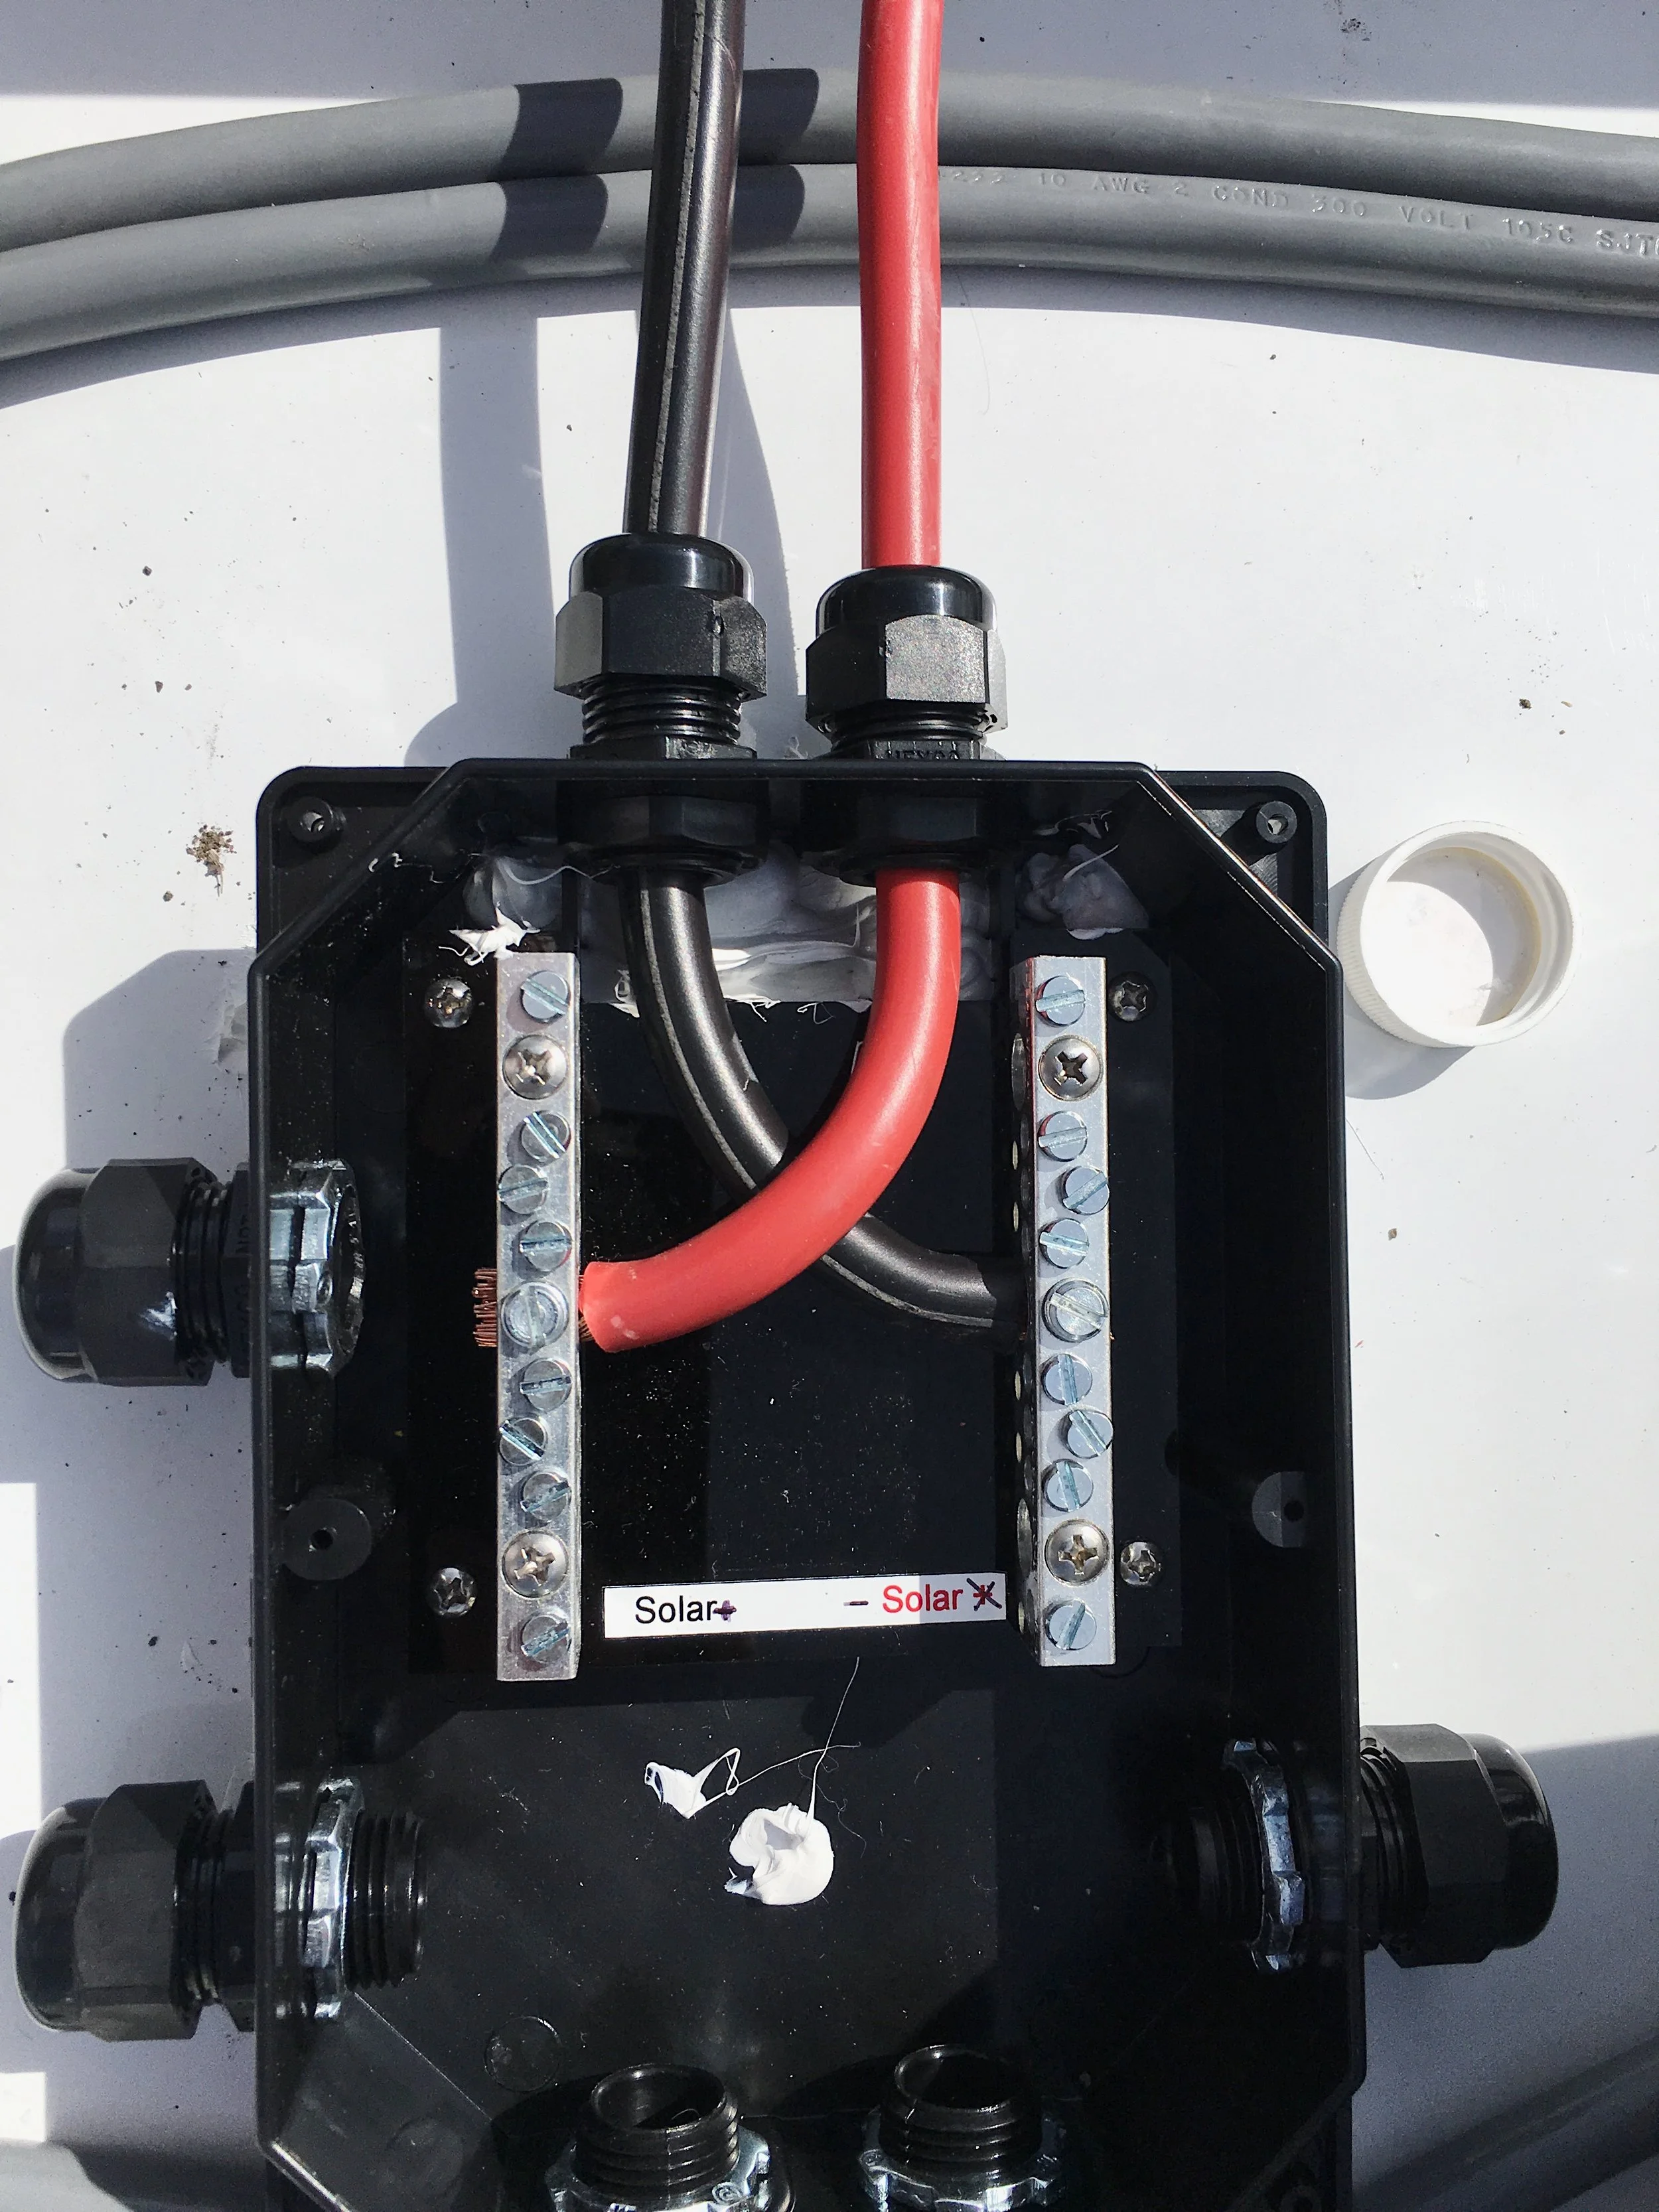
When it came to attaching the wires in the combiner box, the wires were so stiff that I couldn’t get them to the proper bus at the short lengths required in the small space that the combiner box allowed. As a result, I just re-labeled the positive and negative buses in order to criss-cross the wires and attached accordingly. If I had known this would be an issue, I would have swapped which holes I used to run the red and black wires through the vent.
After wiring the combiner box, the next step is route the other end of that wire inside the fridge vent. Luckily, with the refrigerator removed, it was easy to see where to best route the wires.
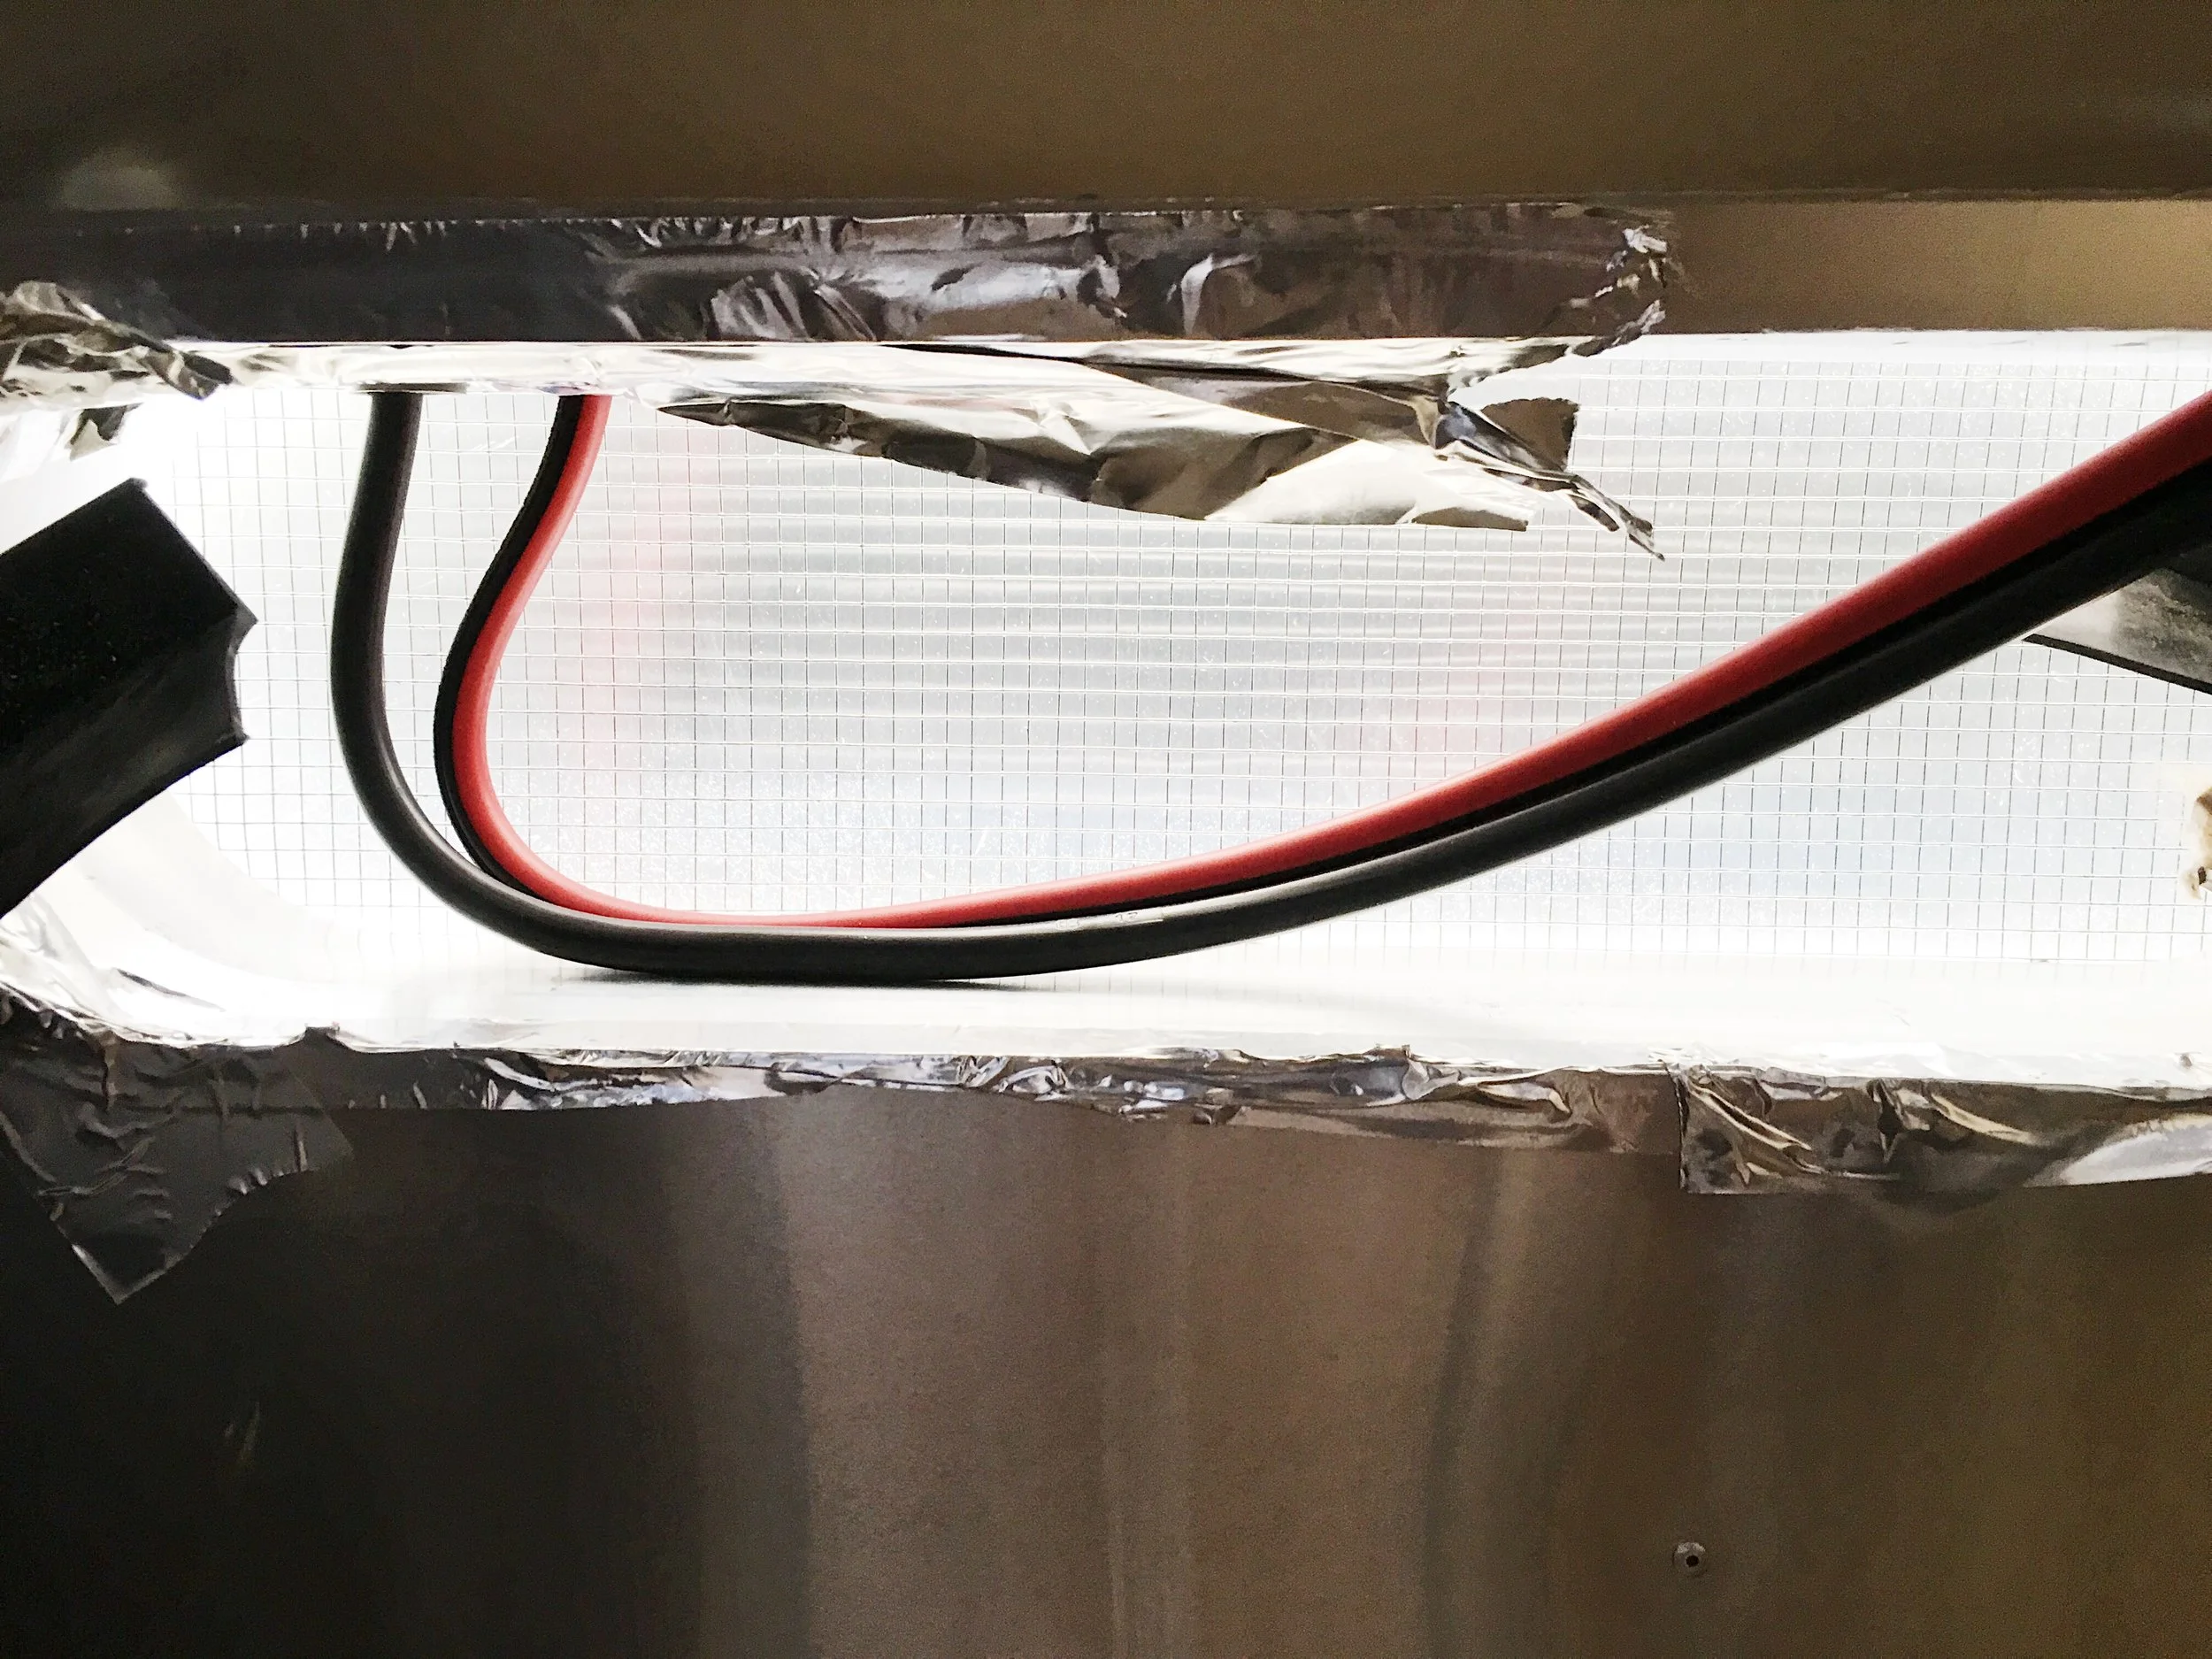
View from the refrigerator looking up at the vent. The end at the top of the image is exiting the vehicle through the vent. The part on the right is what we have to route inside the trailer.
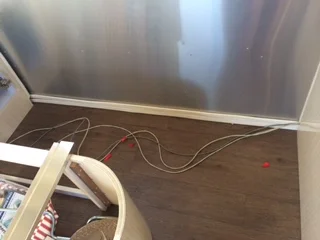
To the right of the fridge vent, there’s space between the fridge and the outside wall. If you run the wire down through this section, you’ll end up right below the fridge behind the main electrical panel and this also happens to be where the channel that runs side-to-side can be accessed.
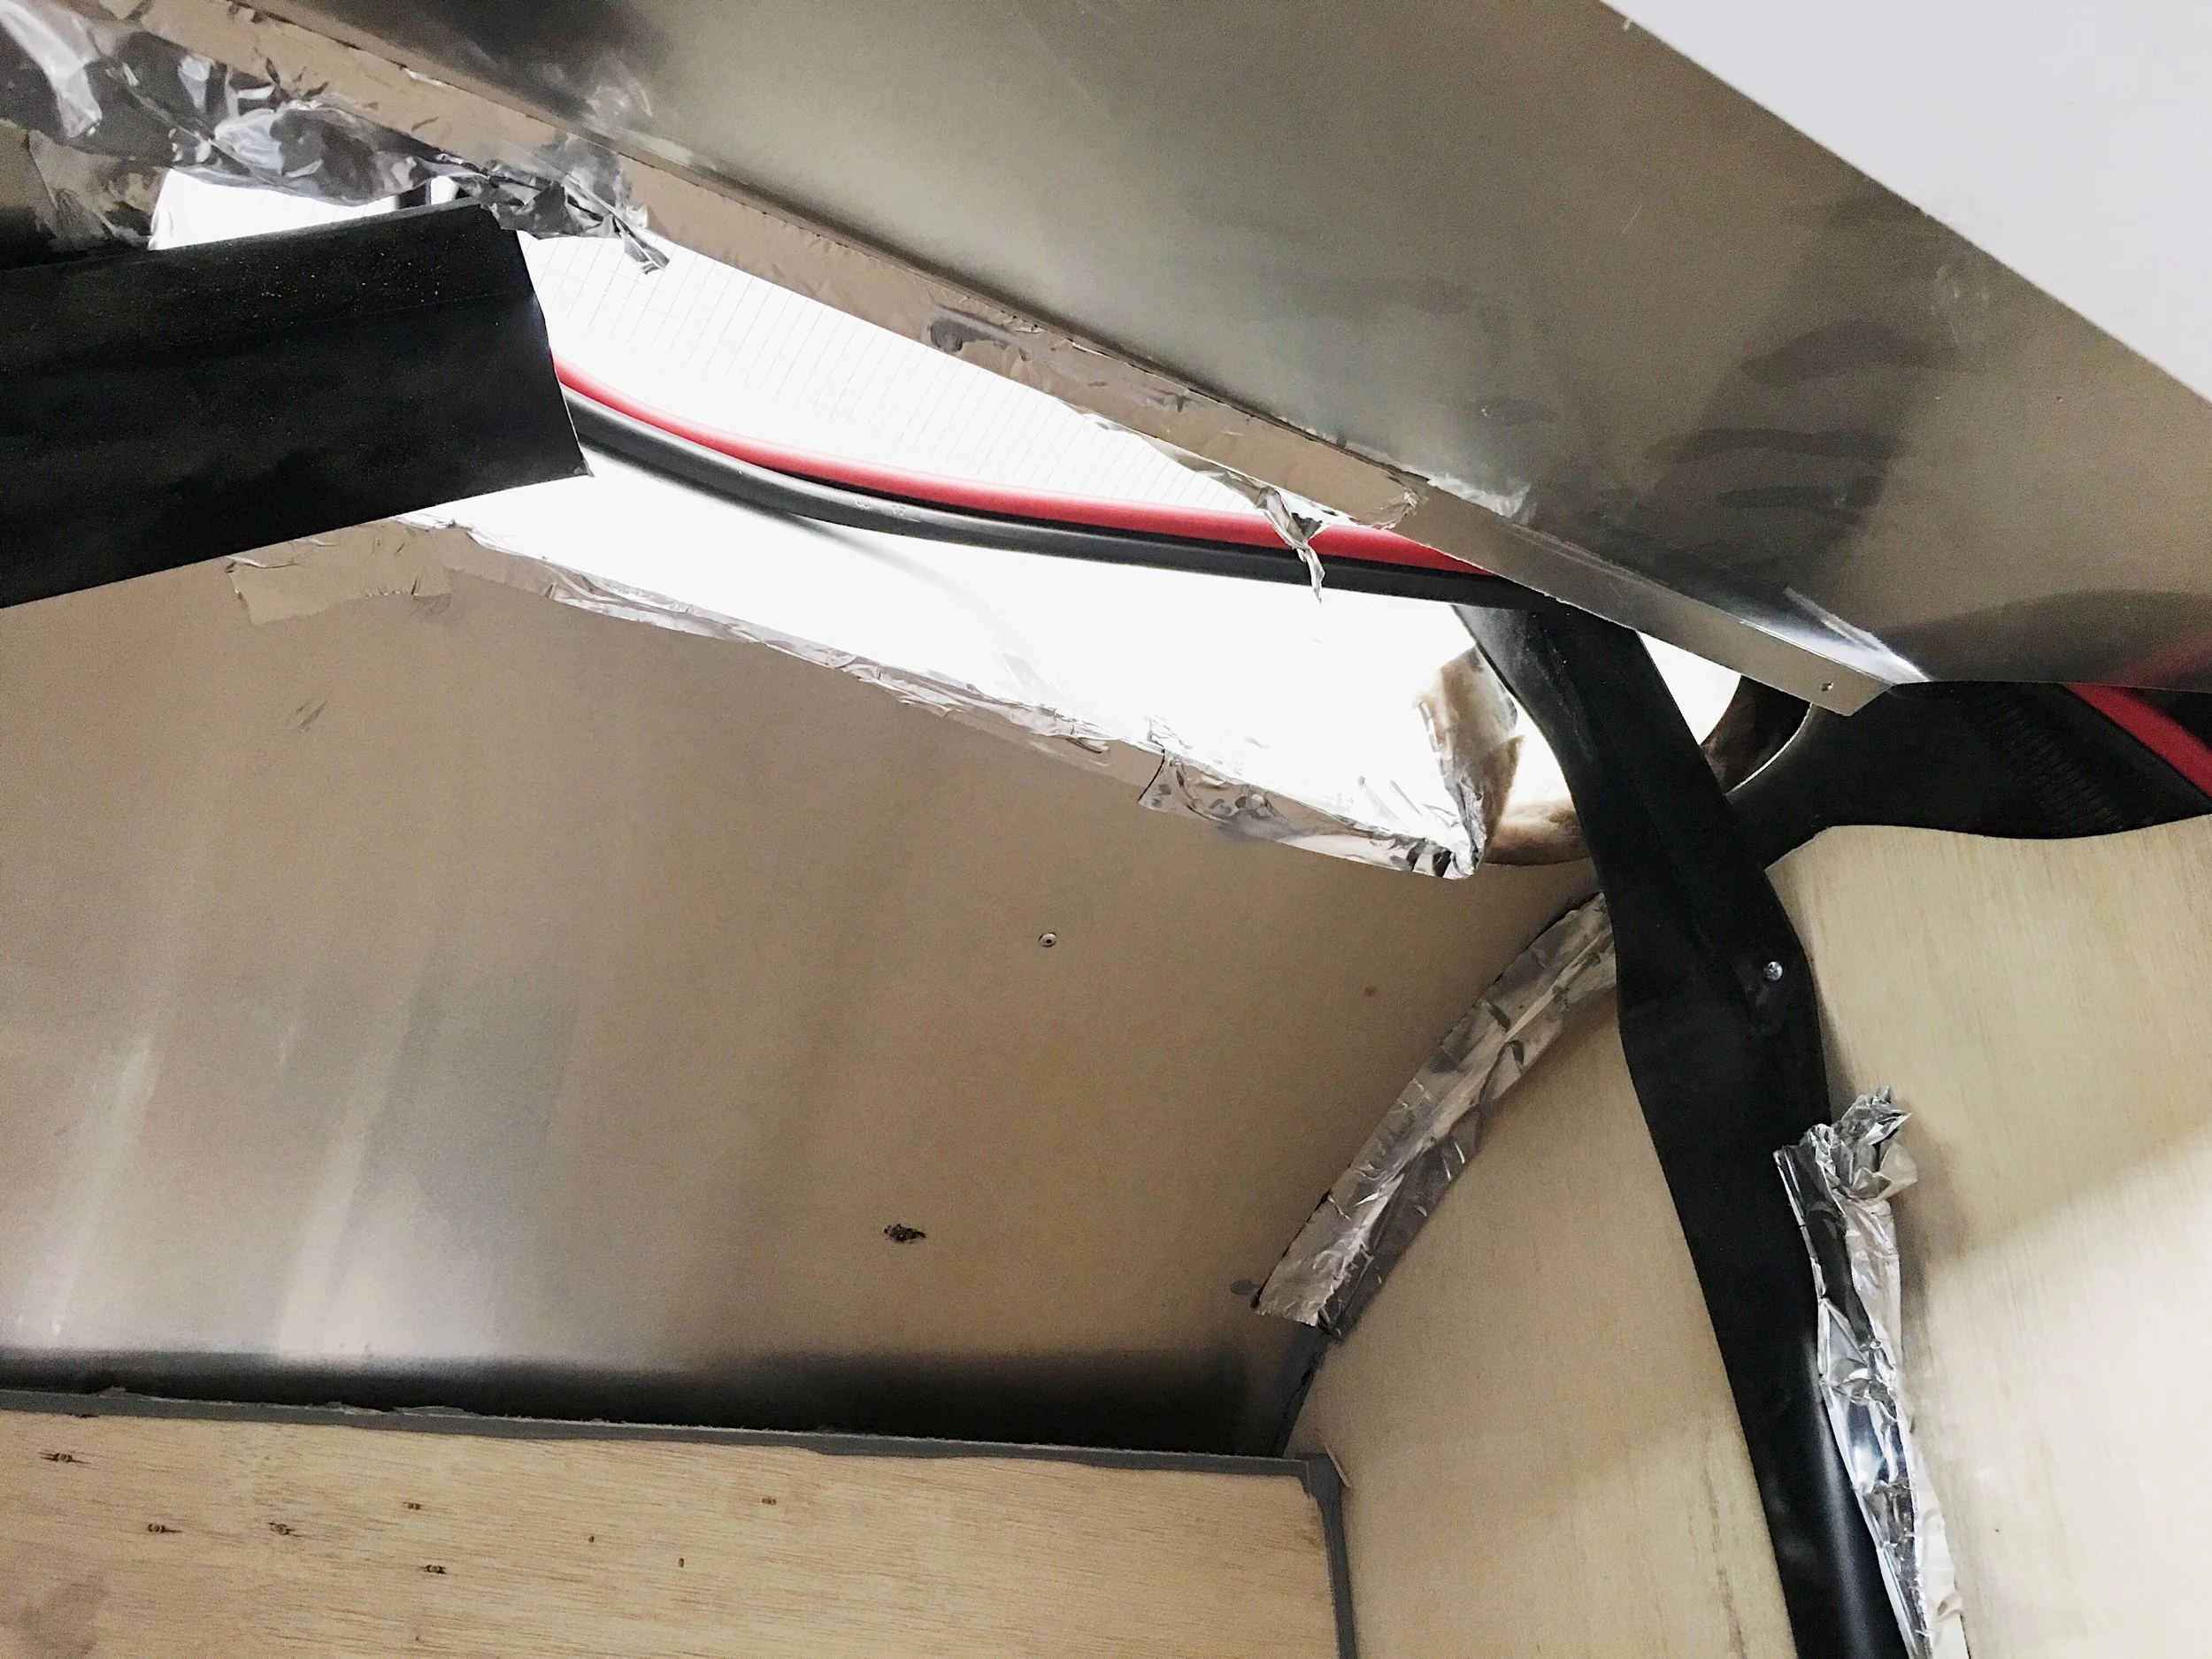
Wire running across to the space between the fridge and the wall holding the TV.
Once that was done, I can finish wiring the combiner box above and terminate all of the solar panels in the combiner box. I chose to wire the panels in parallel so that shade on any one panel does not affect the energy production of another panel down the line. This way, any panel can be shaded and the ones that aren’t will continue to produce electricity. This is the way AMSolar recommends you wire your panels.
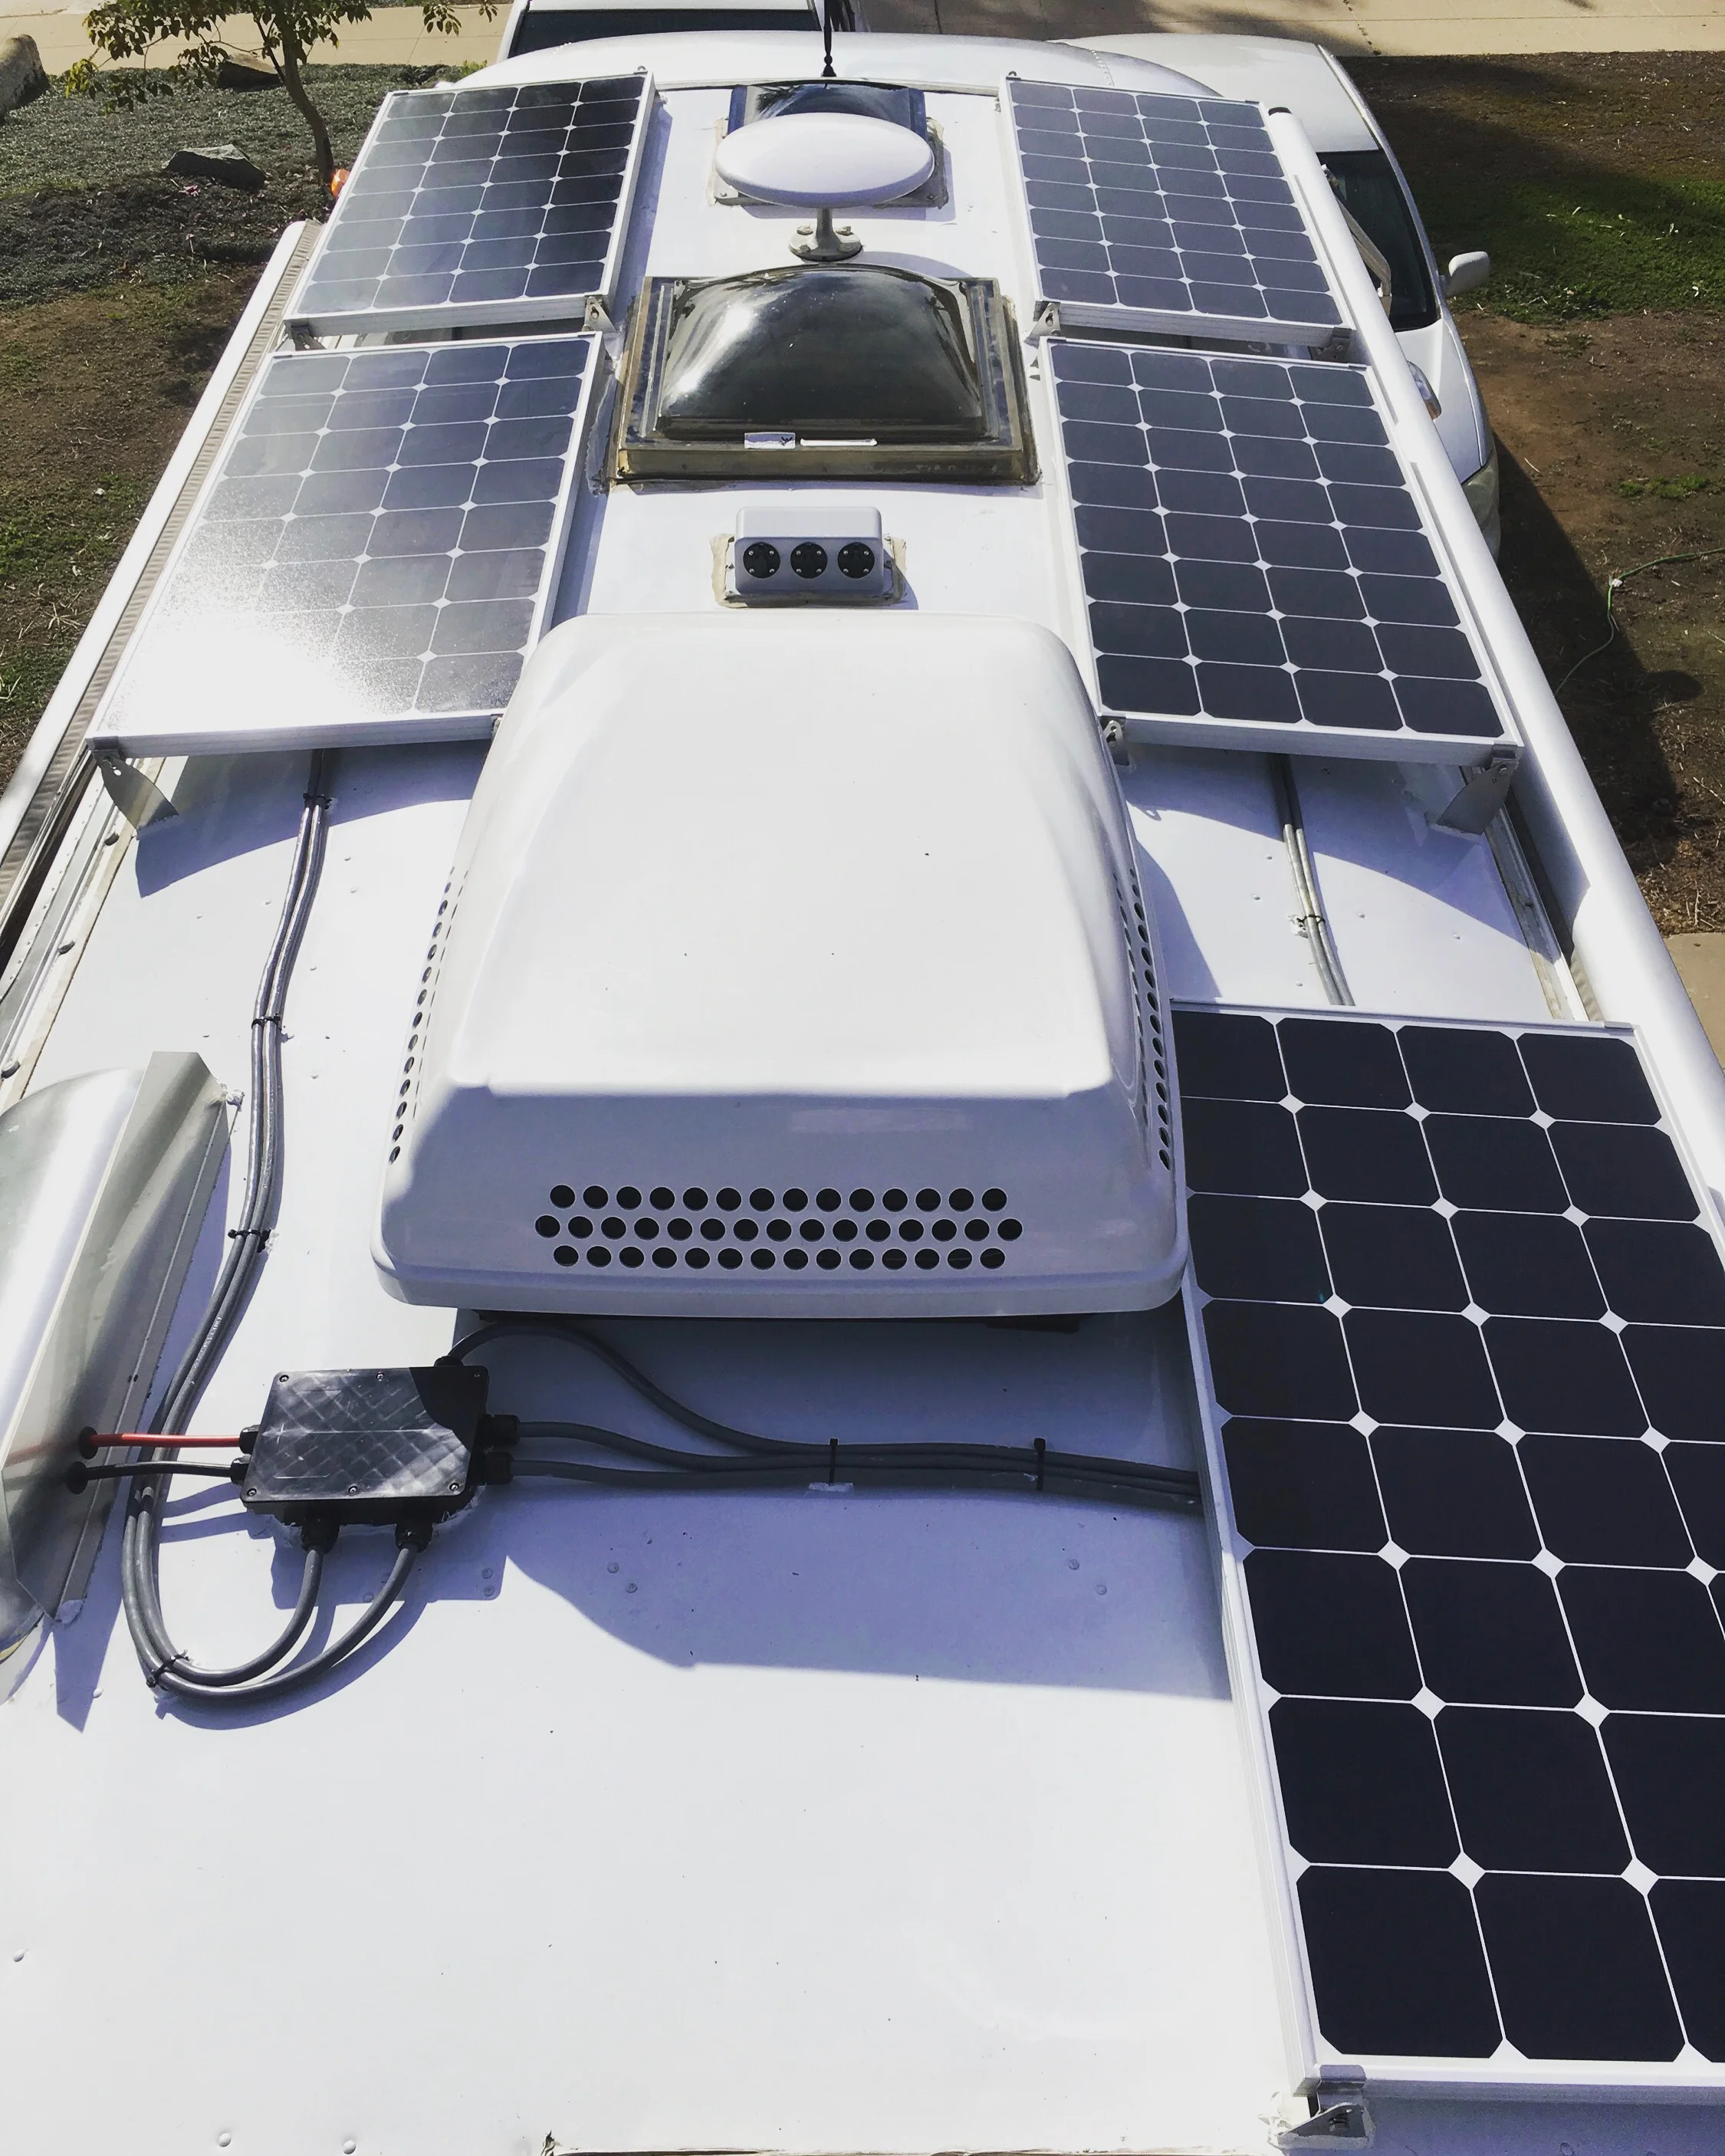
Roof work done.
Reinforcing the closet floor
Since the closet floor was not built to handle 100+lbs of battery and equipment, I had to reinforce the closet floor by installing vertical braces below the closet floor. It seemed to work at the beginning but unfortunately, after traveling for a few weeks, we found that the floor beneath the batteries had failed. Whoops. The lesson here is to make sure you reinforce all points of potential failure.
Placing the batteries inside the closet
Since everything in the trailer already runs on 12 volts and the lithium batteries are 12 volts, they just need to be wired in parallel. Wiring these in parallel results in the same voltage. Wiring them in series results in adding voltages together.
Wiring the MPPT Controller
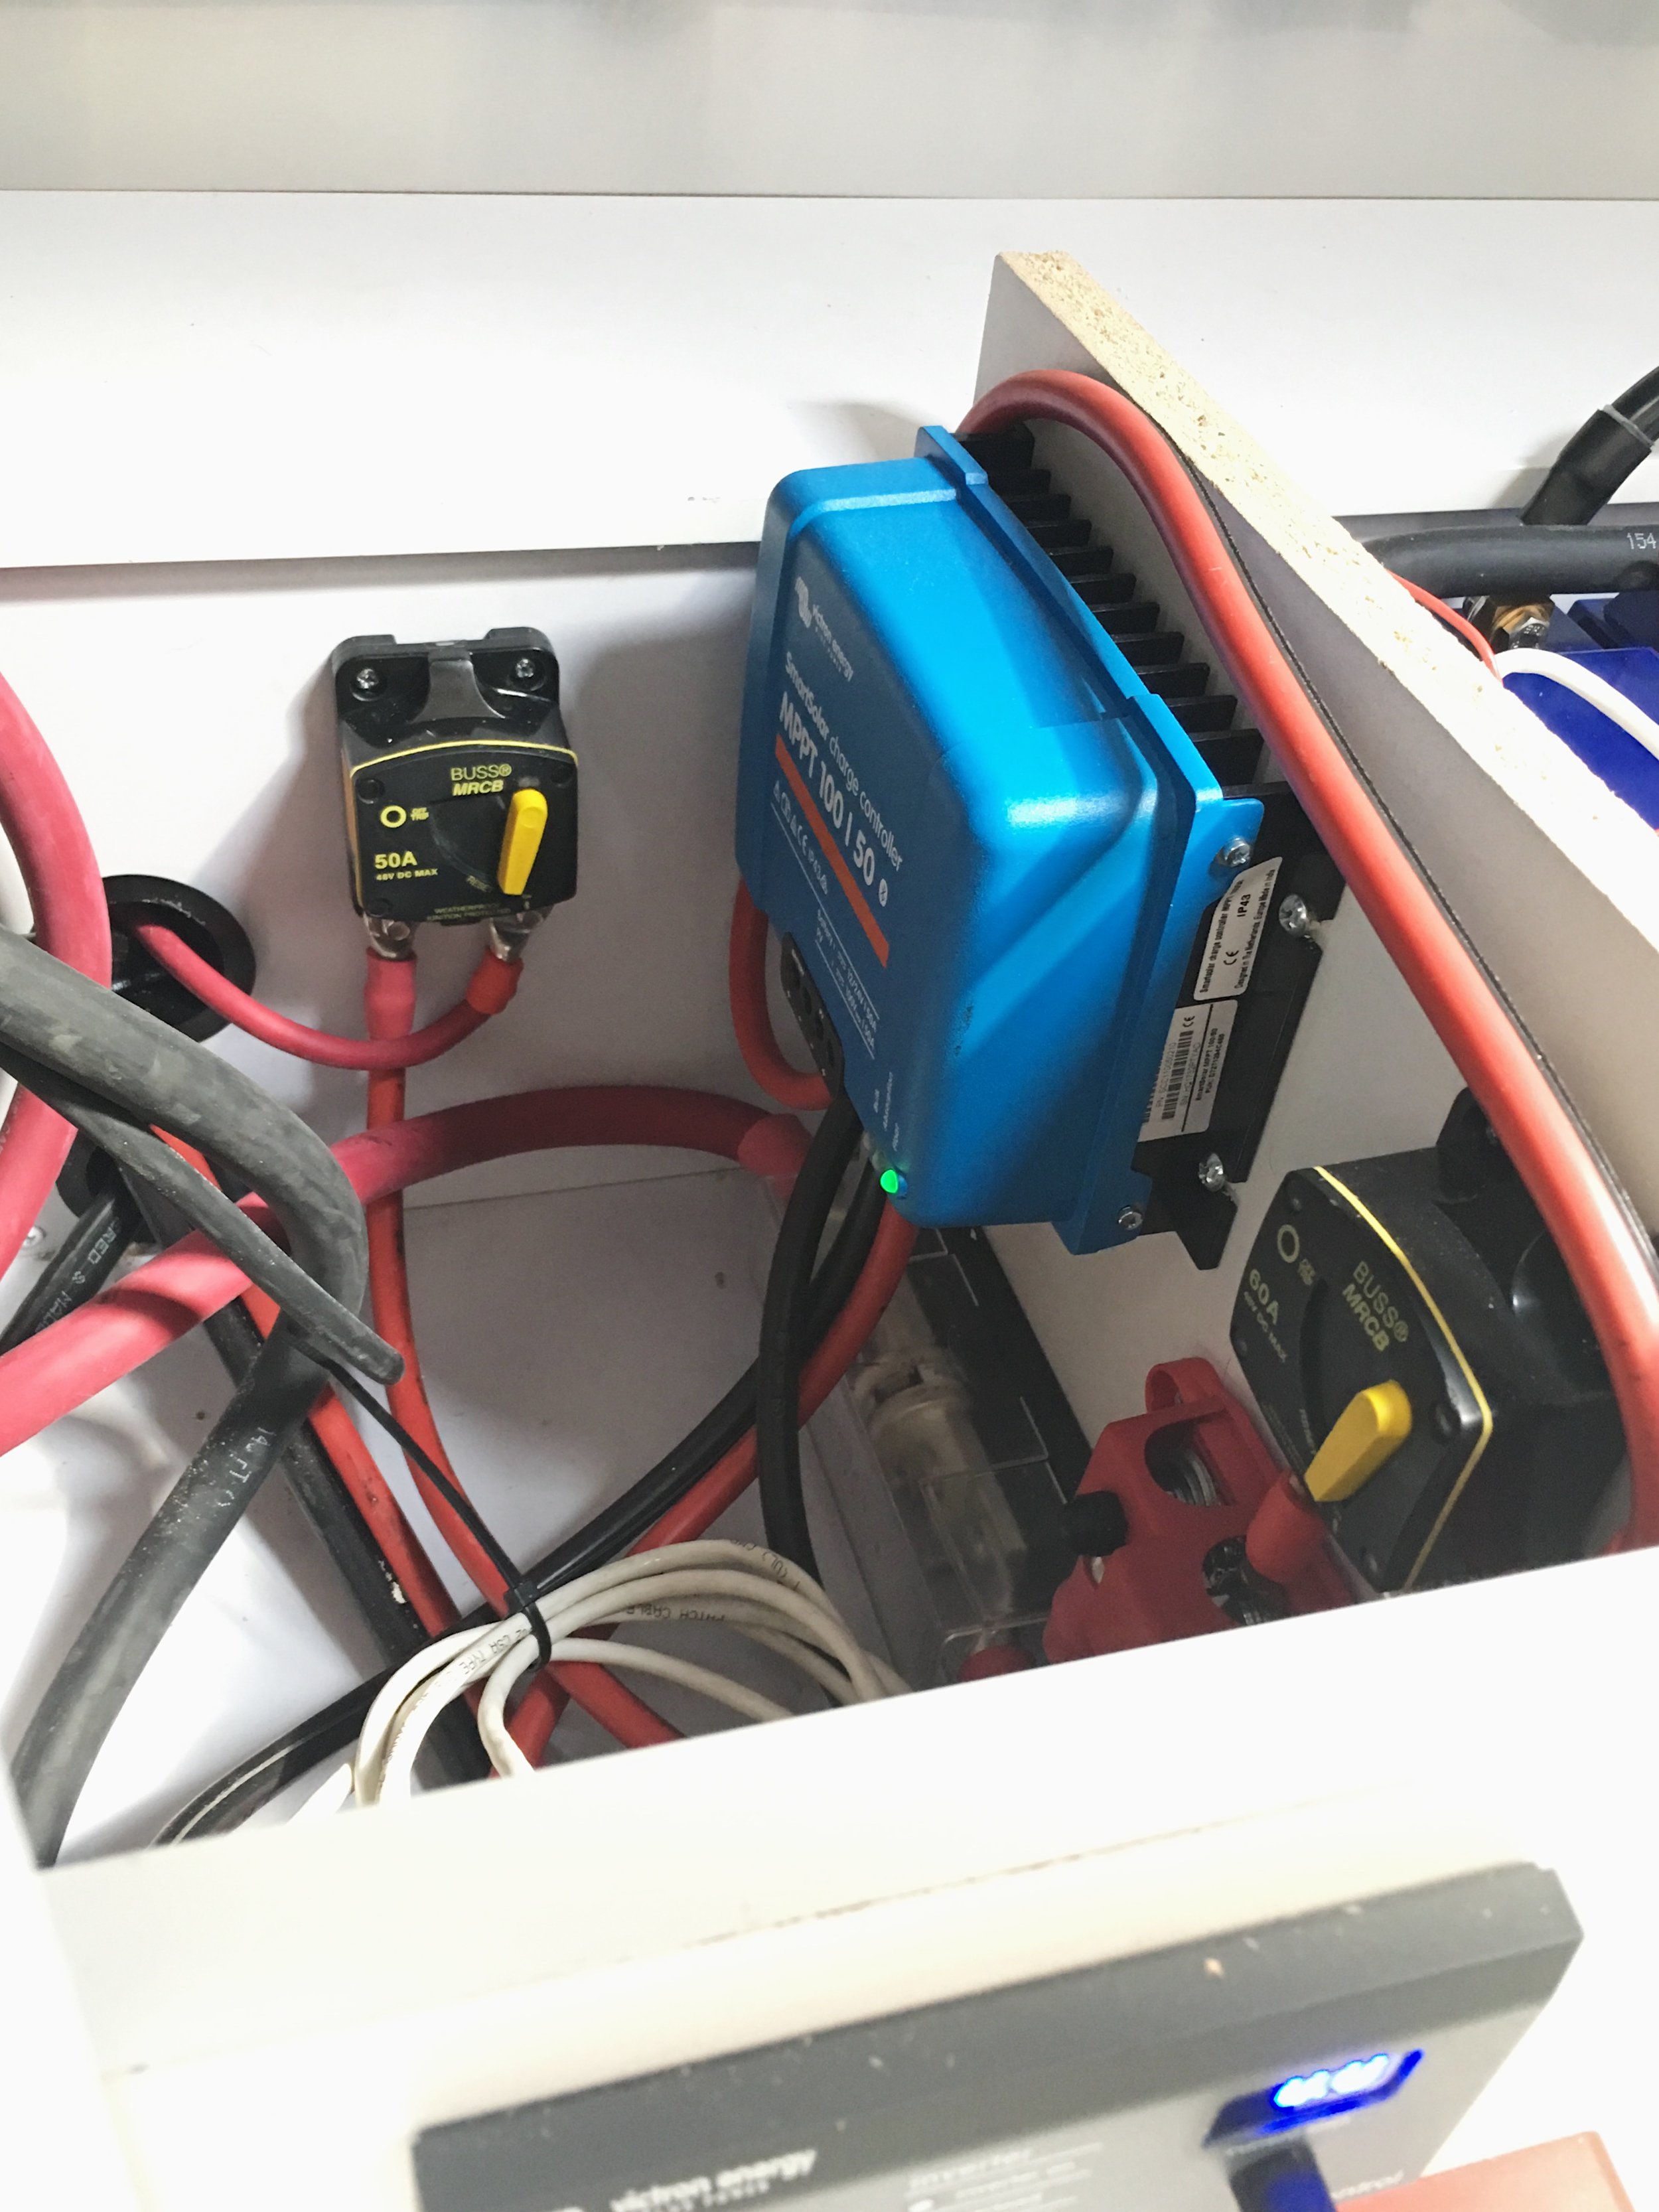
The red and black wires going from the combiner box into the trailer attaches to the MPPT controller through an inline breaker. This breaker’s rating is dependent on the size of your solar array. In my case, a 50 amp breaker is the recommended size. The MPPT controller then wires directly to the batteries. When your solar panels produce electricity, the MPPT controller will regulate the voltage and current going into your batteries.
The Inverter
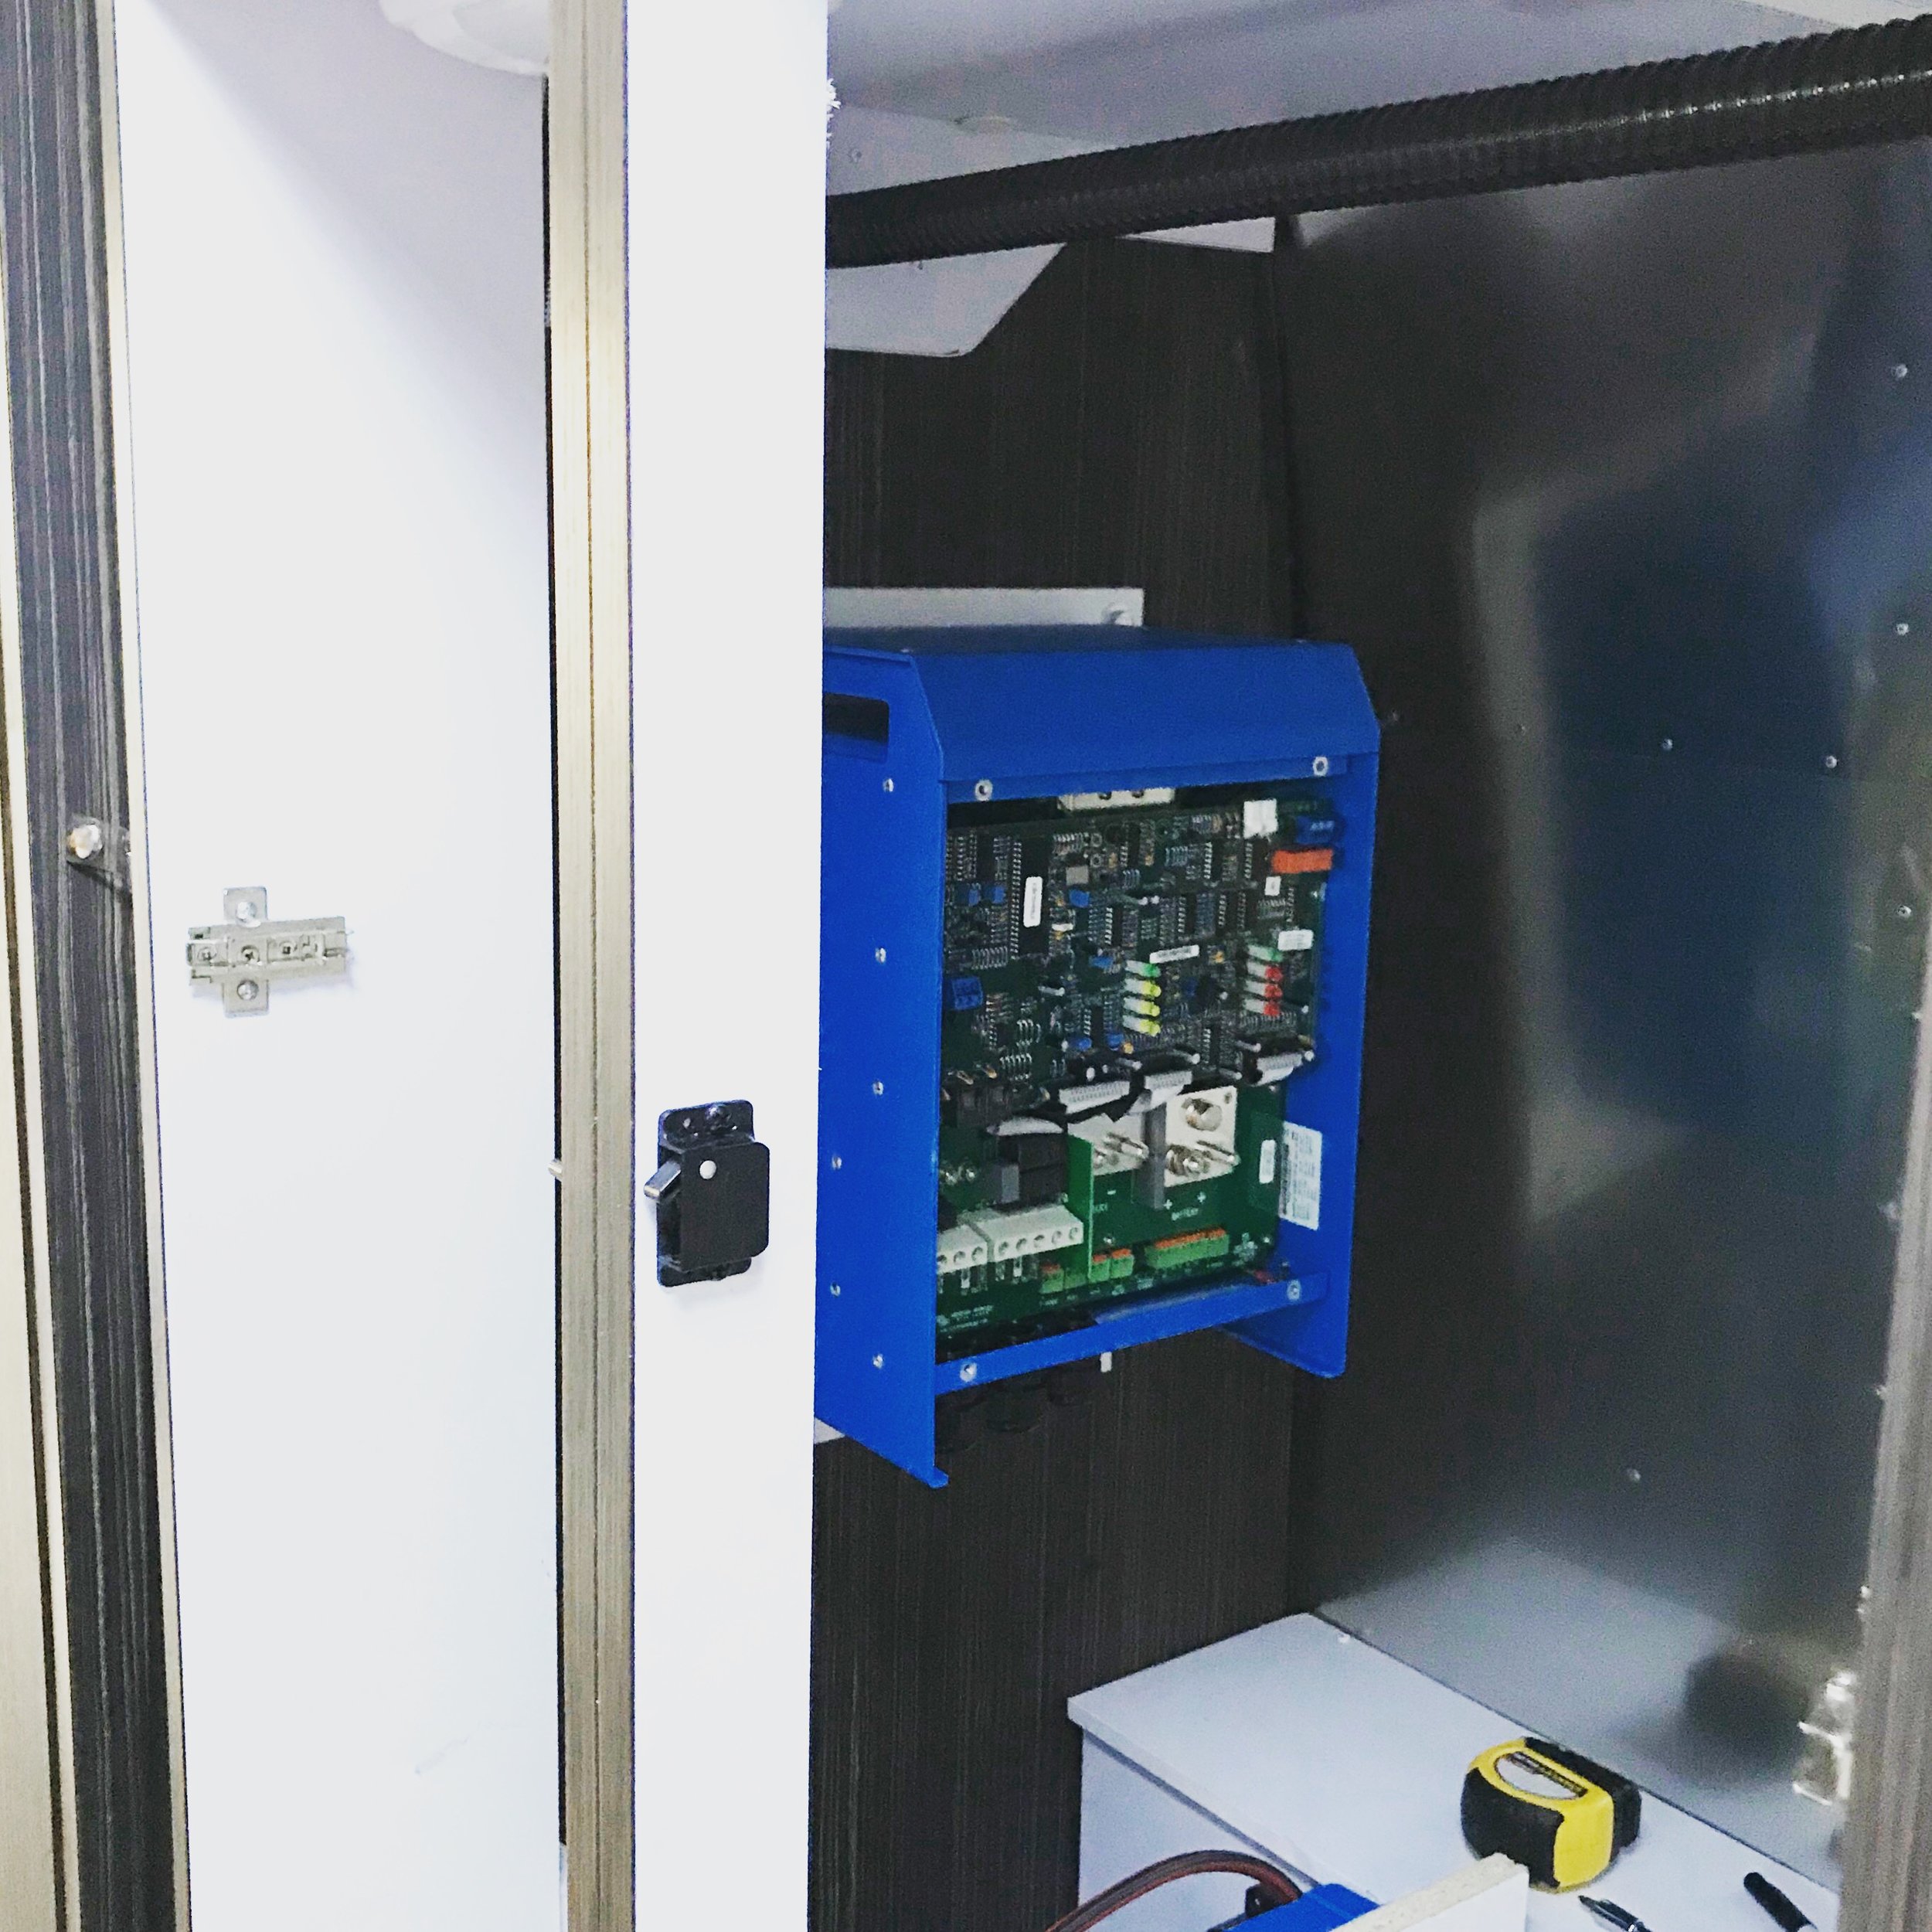
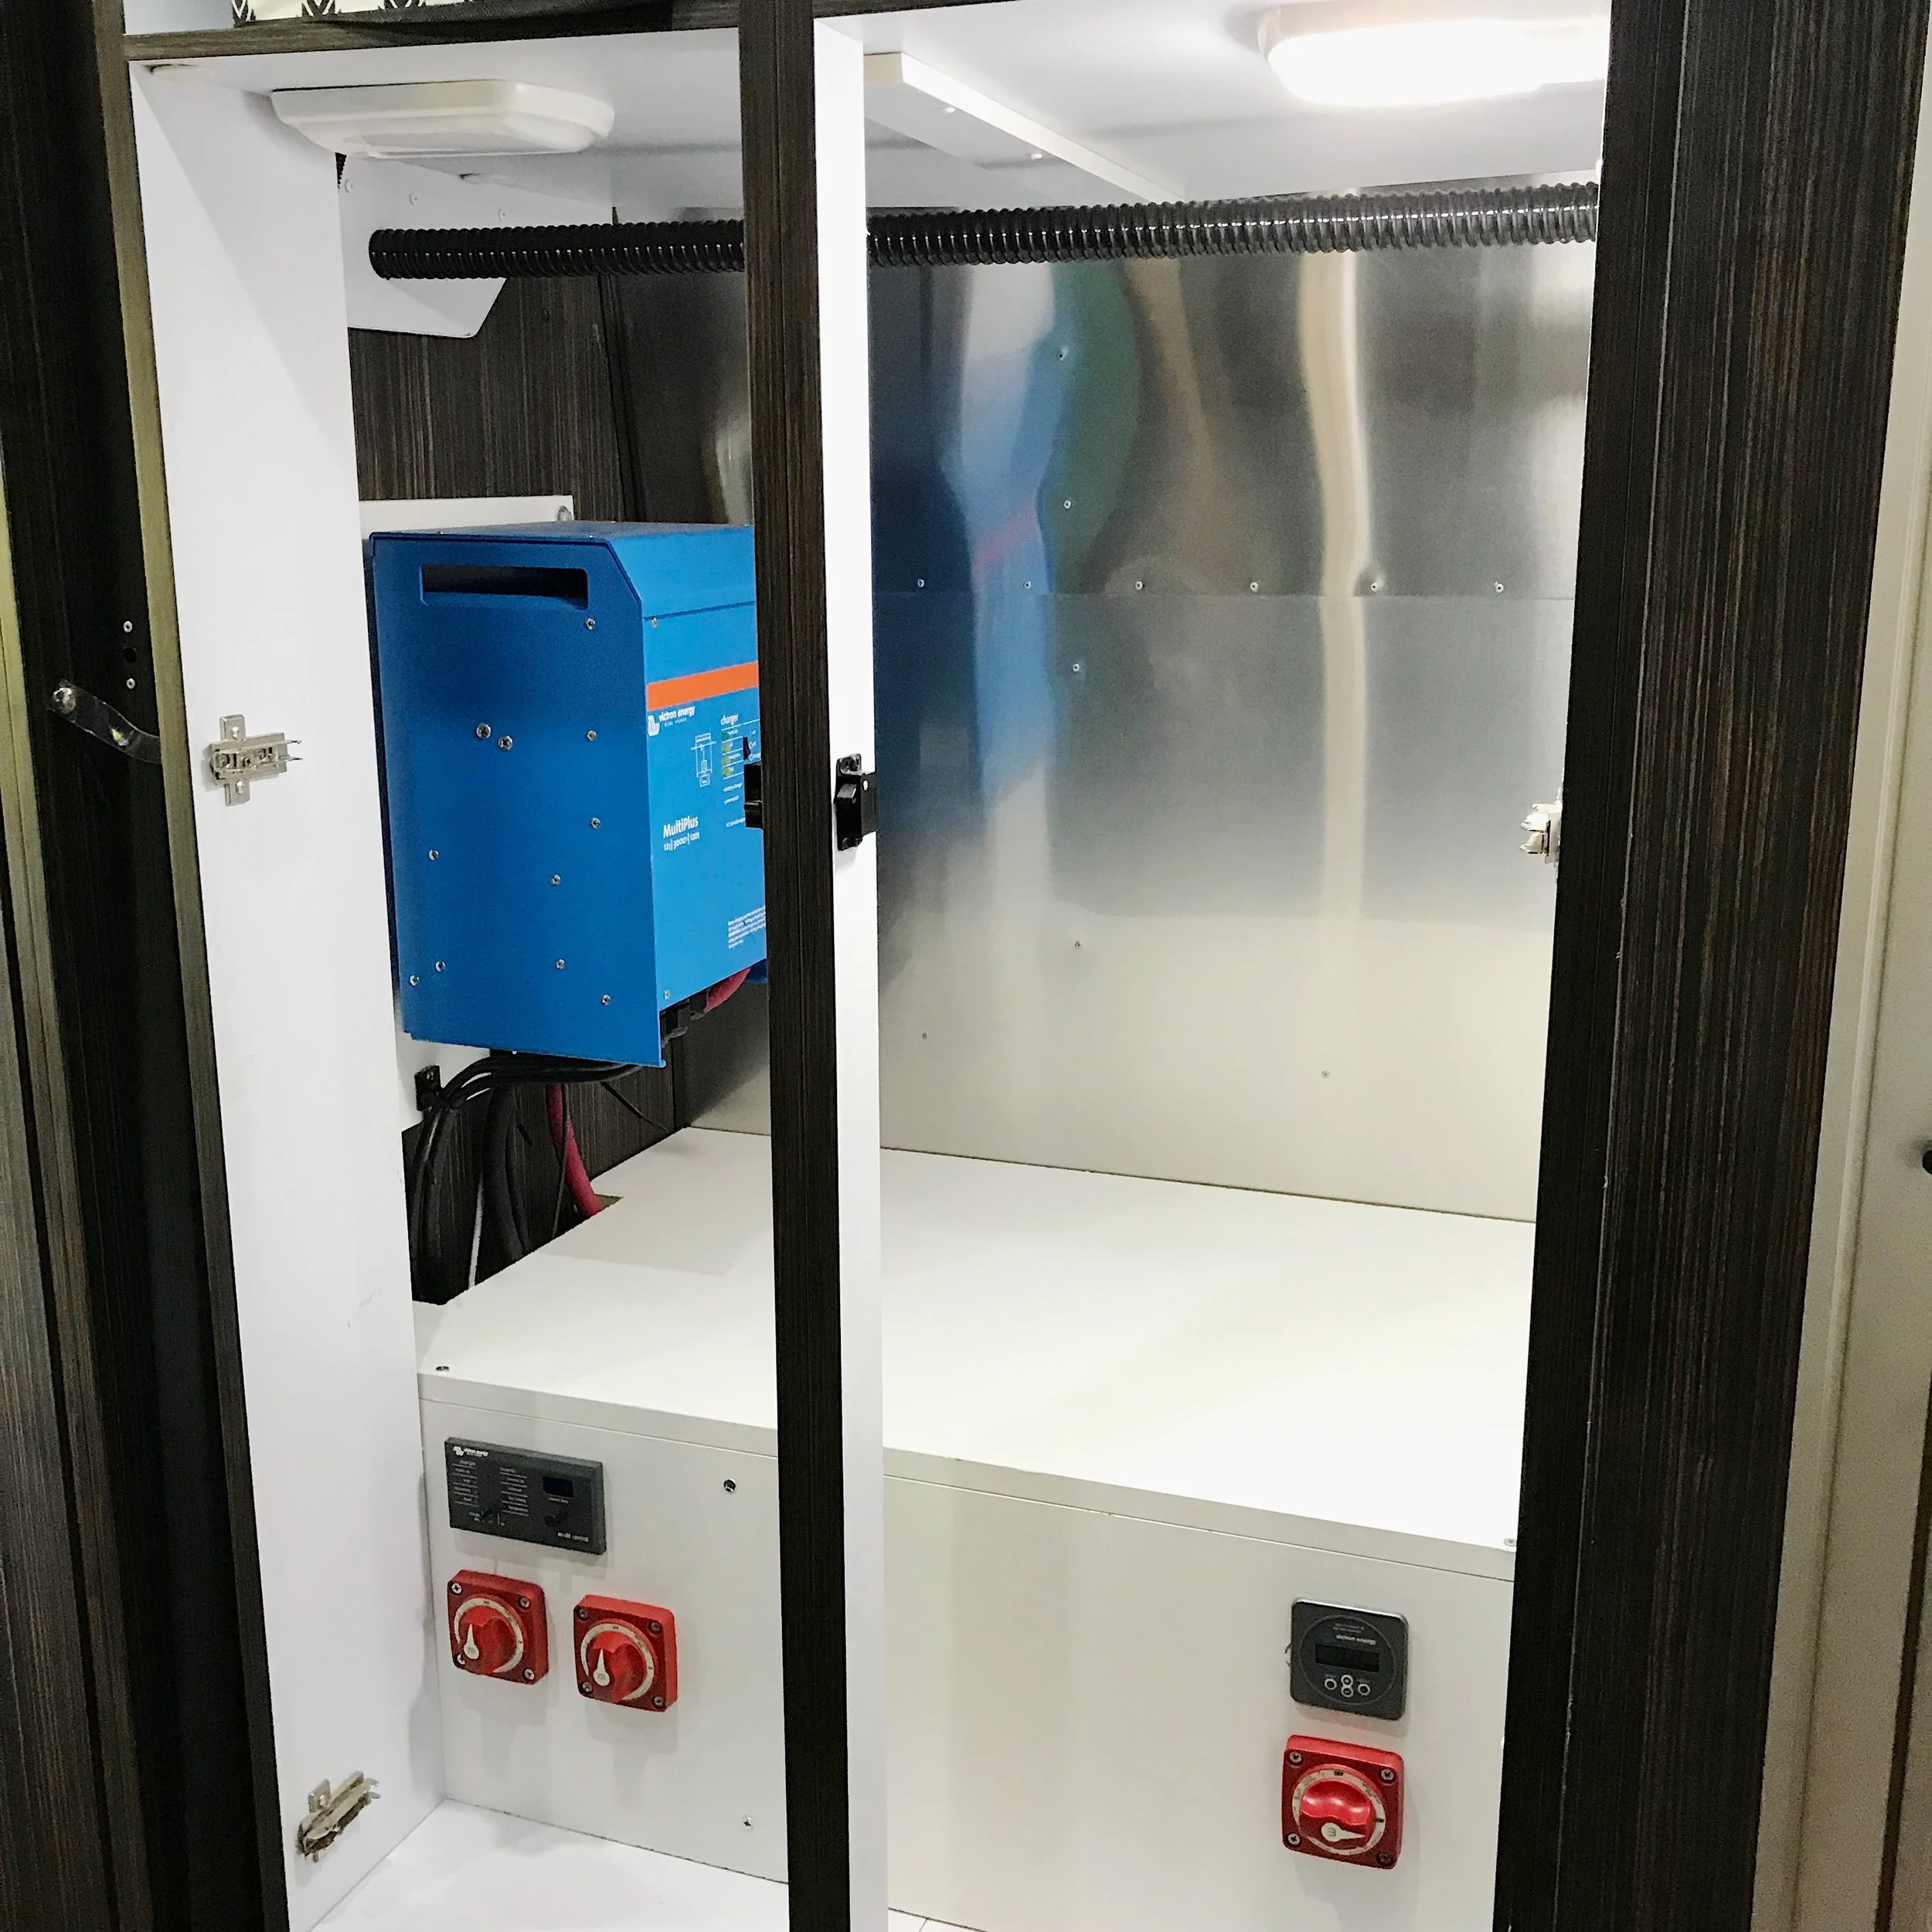
I originally wanted to place the inverter under the refrigerator behind the main electrical panel. I was sure the inverter would fit but when it came to attaching the wires and putting it beneath the fridge, it wouldn’t fit so I had to relocate the inverter elsewhere. Since it is recommended that the wires between the inverter and the batteries be short, the closet was the natural location for it. First, we’ll have to reinforce the closet wall to handle the added weight of the inverter. I cut a piece of melamine I was already using to build the battery box and attached it with bolts, washers, and nuts.
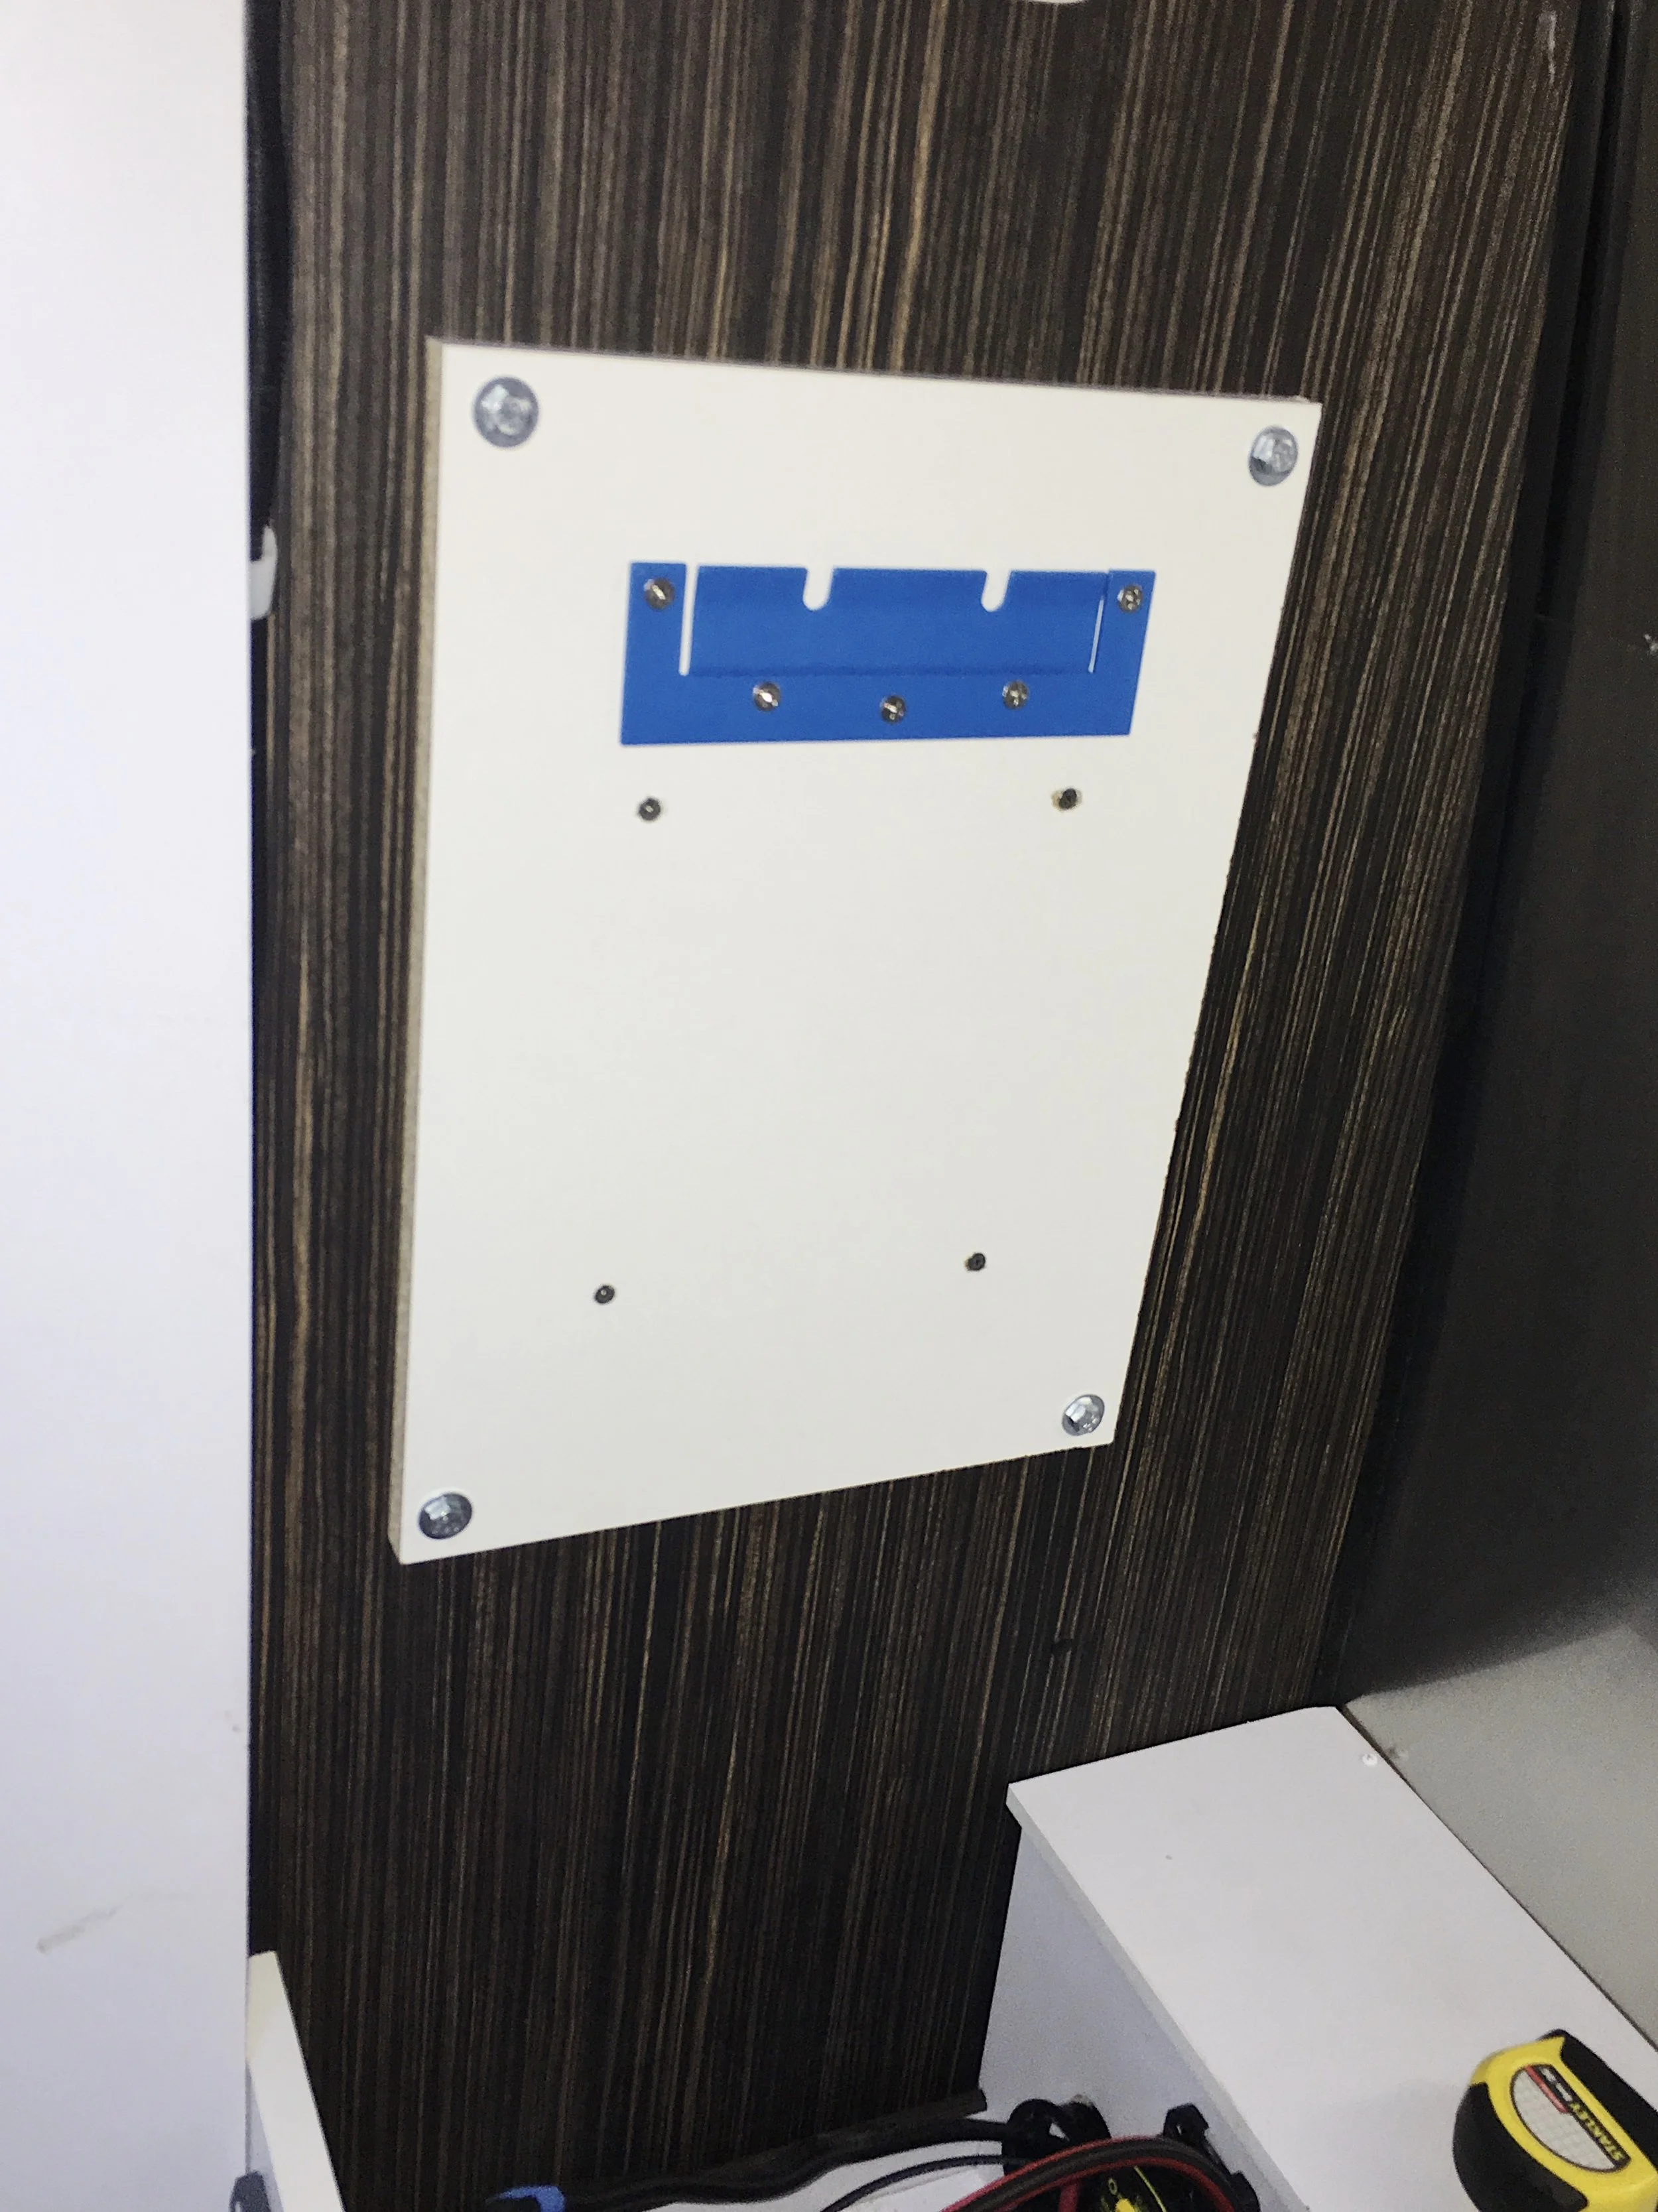
Reinforced with 4 bolts and nuts on the other side. Mounting bracket also installed for the inverter.

Inverter mounted before final wiring. Notice the shunt mounted by the batteries. All negative lines connect to the shunt so it can measure all electricity used. This is crucial to measuring the state of charge in your batteries.
ELECTRICAL PANEL
Since our trailer has 50 amp service, the 50 amp shore power splits into 2 separate circuits inside the electrical panel. We have to decide which circuits we want to allow to be powered by the inverter when no shore power is present. The other circuit will only be powered by shore power. Since the electrical panel that comes with the airstream has one common negative bus bar, we need to split it so the circuits are separate from each other.
The easiest way I found to do this is to remove the single bus bar from the panel and replace it with 2 different ones that are each about half the length of the original.
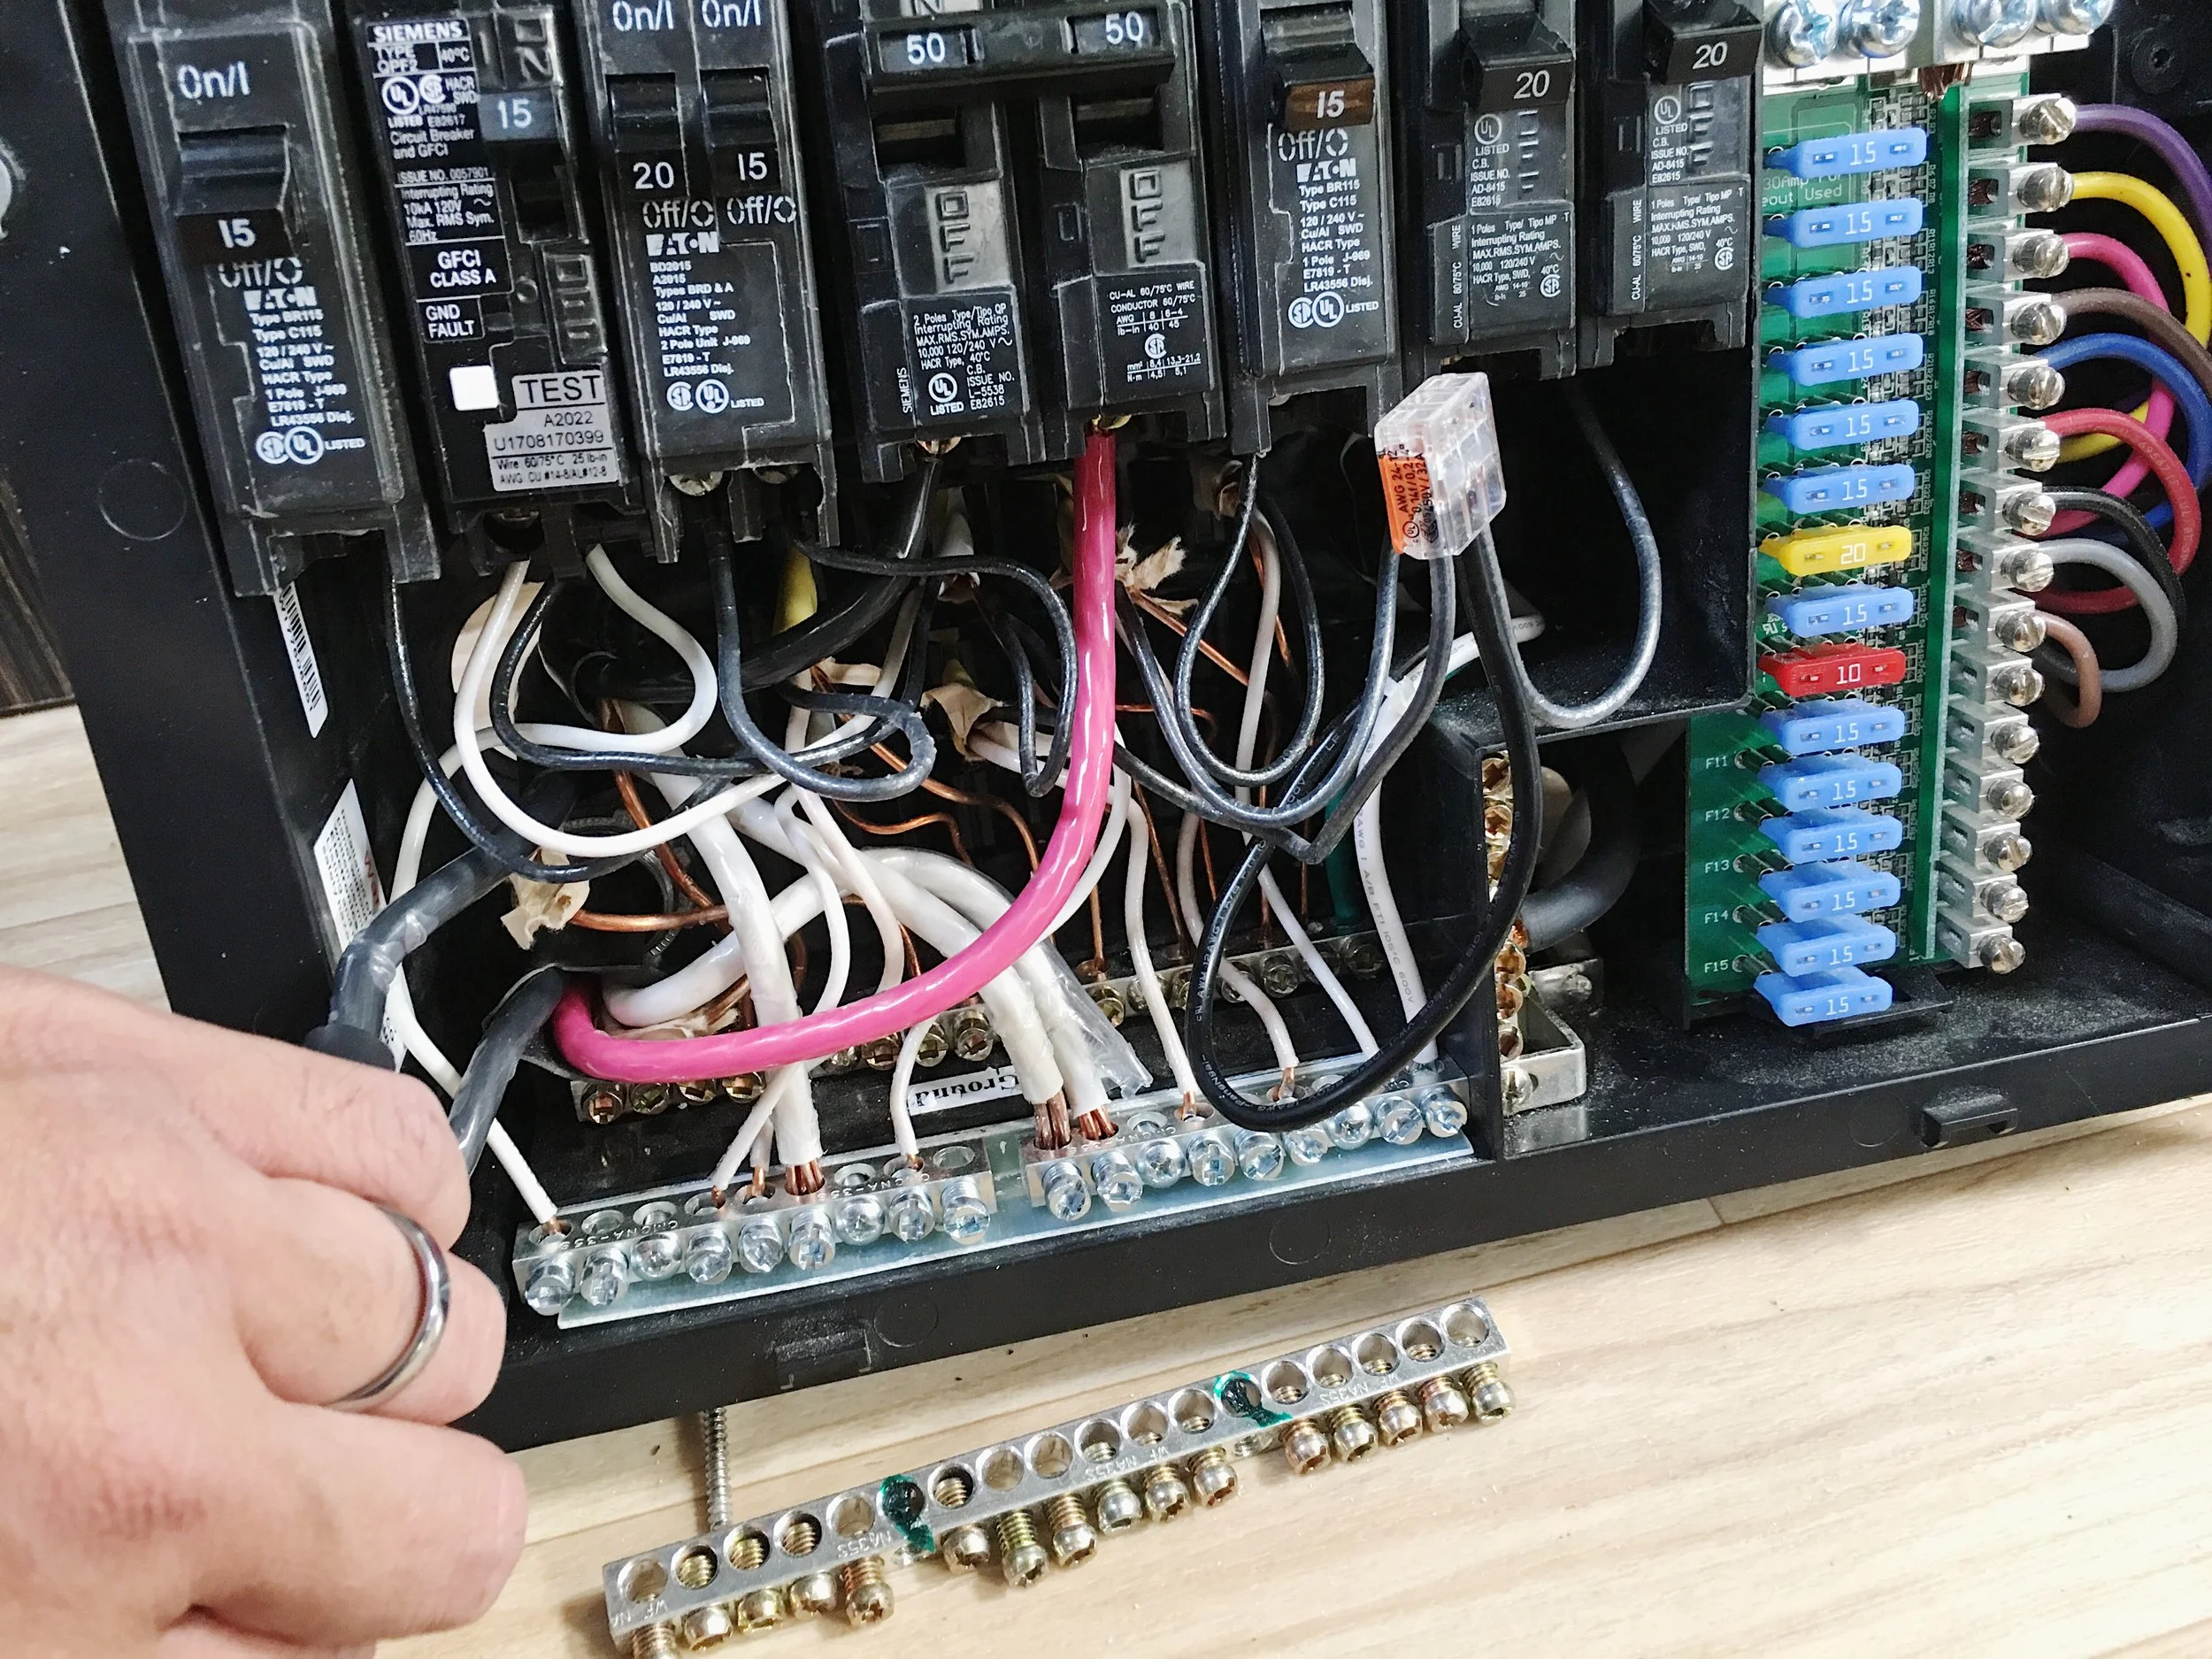
The original bus bar on the floor and the 2 separate bus bars immediately above it in the box.
The goal with re-wiring the main electrical panel is that we wanted the commonly used amenities to be available through the inverter. This includes all inverter circuits to be powered including the kitchen outlets to power the microwave, charge our devices, and power most of the onboard electronics. In addition to this, I also wanted the ability to power one of the AC units. Achieving all of this requires moving some breakers around in the electrical panel and relocating wires as necessary.
The panel itself is split right down the middle so pick one side to be powered by the inverter and make any breakers on the other side require shore power and relocate required circuits to the proper side.
Finishing touches
After wiring up all of the components I wanted to provide a finished look and give back some closet space to my wife. It turns out that some of the walls in the Airstream aren’t exactly parallel so the fit is a little off. Overall, the system is working very well. We can boondock for weeks at a time. If we run the air conditioning, we’re able to go about an hour before our batteries are at 50% and it’s been useful a handful of times.
Finished box with cut-off switches, inverter control pane, and battery monitor.